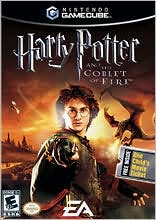
The Perfect Walkthrough - Guide for Harry Potter and the Goblet of Fire
- Cheats |
- Unlockables |
- Hints |
- Easter Eggs |
- Glitches |
- Guides
Scroll down to read our guide named "The Perfect Walkthrough" for Harry Potter and the Goblet of Fire on GameCube (GameCube), or click the above links for more cheats.
Tynkerbell68 Krislynn Johnson [email protected] February 5, 2006 Faq version 1A Copyright HARRY POTTER and The Goblet of Fire This is a walkthrough that I painstaking wrote down every move that I made. You all know the controller buttons and what they do, so I didnt include that. 1: Players 2: Cards 3: Jinxes 4: Opening Levels 5: The Quidditch World Cup 6: Defense Against the Dark Arts: 7: Hogwarts Exterior Vanishing Cards 8: Moodys Challenges Vanishing Cards 9: Forbidden Forest Vanishing Cards 10: Triwizard Tournament Task 1- The Dragon 11: Prefects Bathroom Vanishing Cards 12: Triwizard Tournament Task 2- The Lake 13: Herbology Vanishing Cards 14: Herbivicus Charms- Go back to the other levels to get remaining shields 15: Triwizard Tournament Task 3- The Maze 16: Voldemort This is a long game and you have to go back into each level many times. TABLE OF CONTENT 1: Players 2: Cards 3: Jinxes 4: Opening Levels 5: The Quidditch World Cup 6: Defense Against the Dark Arts: 7: Hogwarts Exterior Vanishing Cards 8: Moodys Challenges Vanishing Cards 9: Forbidden Forest Vanishing Cards 10: Triwizard Tournament Task 1- The Dragon 11: Prefects Bathroom Vanishing Cards 12: Triwizard Tournament Task 2- The Lake 13: Herbology Vanishing Cards 14: Herbivicus Charms- Go back to the other levels to get remaining shields 15: Triwizard Tournament Task 3- The Maze 16: Voldemort Players It is important that if you are playing with one player that you dont just play with one character. It is beneficial that you play with all 3 characters at different times so that they can collect beans and be able to buy cards. To get new cards you need to increase tour skill. Every time your skill increase cards become available. Items in Every Level Large Shields- 38 Total for the game. To get all 38 you have to get Gold in all of the tasks. Small Shields- 10- There are in each level Gargoyle Statue- 5- Is in ever level Dark detectors- 5- Hogwarts exterior Mushrooms- 5- Forbidden Forest Water Taps- 5- Prefects Bathroom Shovels- 5- Herbology Vanishing Cards 1- Hogwarts Exterior, Moody's Challenge-Exploding Cauldrons Forbidden Forest, Prefects Bathroom, and Herbology *****NOTE: Before you start a level it is a good idea if you for you to go to the info menu (Y) to see what items you need to collect. It is also a good idea if you periodically go back to see what your missing.********* Cards Beans by the cards so it is important that you collect as many beans as you can. When you by all of the cards in a set, you will get extra good cards added to your deck. Check them out when you choose your cards for the level youre playing. When your skill increases, cards will become available. Beans by the cards so it is important that you collect as many beans as you can. When you by all of the cards in a set, you will get extra good cards added to your deck. Check them out when you choose your cards for the level youre playing. Note: Rons cards cost a lot more than the other 2. So make sure you gather beans for him as well. *When your skill increases, cards will become available* Jinxes As you well know to increase your skills you have to master the spells. Wingardium leviosa, aqua eructo, carpo retractum, and even Herbivicus are easier to master. It is the spells that are designed for specific creatures that are more challenging to master. You will notice that Avifors appear with most of the creatures, but the way it is cast is sometimes different. Here is a guide to these spells. Dugbog- Orchideous- you have to continually jinx it Avifors- you stun the Dugbog use wingardium Leviosa and one of the other jinxes it Orbis- DO NOT stun it, just use wingardium leviosa and one of the others will jinx it. Fire Salamanders Lapifors- you have to continuously jinx it Inflatus- Be careful and stun the salamander then cast aqua eructo, one of the others jinx Ebublio- Cast aqua eructo and one of the others will jinx it Erklings Pullus- Continuously jinx it Orbis- For this jinx you have to stun it, just use wingardium leviosa and one of the others will jinx it. Melofors- Cast carpo retractum and then one of others will jinx it. Vamppyr Mosps Vermiculus- you have to continuously have to jinx it Orchideous- You have to stun it and then cast Herbivicus and one of the others will jinx it. Inflatus- cast carpo retractum and then one of the others will jinx it Blast-Ended Skrewt Inflatus- You have to make the skrewt run in to something that will make it dizzy and then jinx it several times Ducklifors- Cast aqua eructo and one of the others jinx it. Avifors- 2 of them have to use wingardium leviosa and the 3rd jinxs it Opening Levels You have to get a certain amount of large shields in order to open the levels of the game. Each level has 10 small shields which equals 1 large shield. Here is the Amount of shields to open each level: 1 Shield: Hogwarts Exterior 3 Shields- Moodys Challenge-Dugbog Avifors Forbidden Forest- 1st Part 7 Shields- Moodys Challenge-Levitation Challenge Forbidden Forest- The rest of the Forbidden Forest 8 Shields- Triwizard Tournament Task 1- Hungarian Horntail Dragon 10 Shields- Moodys Challenge- Exploding Cauldrons 14 Shields- Prefects Bathroom After you complete Task 1- Dragons 15 Shields The rest of Prefects Bathroom ****After the 3rd Task- The Maze Voldemorts level ****** *****will become available****** After you get a Large Shield you will exit the level automatically and have to go back into the level to continue!! The Quidditch World Cup Make it to the Port Key- Kill Creatures, move rocks and branches. Make sure you collect the chocolate frogs. I believe there are 2 chocolate frogs. Charm everything to get extra beans. ***The chocolate frogs come in handy. When you faint because all of your stamina beans are gone, the chocolate frogs wake you up* Defense Against The Dark Arts Follow Moodys instructions to learn the basic skills and to be introduced to dugbogs and fire salamanders. Make sure to charm everything to get extra beans and collect the chocolate frogs, there are 3 of them. *****1 Large Shield. ***** Hogwarts Exterior ****VANISHING CARD*** You have to get the this card first and is easy to get. Take the stairs to your right and go past the 3 large blocks. There is a ramp you can go down. Go down it and the card is there. You start on the crest on the ground, go straight and youll get a *Small shield* Take the stairs to your right, turn left go to the 3 large blocks. Levitate the blocks to the wall; stack 2 blocks on top of each other and put the 3rd right next them. Climb up the blocks and the wall. There is a *Gargoyle Statue, Jinx It.* Go to the right and follow the path around and youll get a *Large Shield* From the crest on the ground take the stairs to your right, at the bottom of the stairs turn slightly to your left and go down the ramp. Destroy the wall straight in front of you, on the left in front of the wall there is a *Dark Detector Jinx it* Destroy the walls of your left; there is a platform that you can climb up, climb up on it and on the left is a *Gargoyle Statue Jinx it* On the platform, go to the gate at the far end. You will see a large block on a platform across the way. Levitate block down to the ground. Climb down and destroy walls. Get the block and take it with you, youll need it. In the chamber with the fire salamander there is a *Small Shield* To get the *Large Shield* Put the block against the wall of the platform, climb up and get it. (Dont forget to collect the chocolate frogs) From the crest on the ground, go back down to the area with the walls. Destroy all of the walls on the left. There is a fountain, destroy it with a cauldron. To get the small shield, you have to go and get the large block off the platform. Put the block next to the fountain and climb up to get the *Small Shield* Youll come out at a courtyard. Take the passage on your left. Put out all of the fires. This passage will take you to another courtyard. Put out the fires in the pits so that the fire salamanders will stop coming out of them. Kill all of the salamanders. Smash all of the tower supports by the fire pits, there will be a *Small Shield* Go to the fountain on the right and youll find a *Dark Detector, Jinx It* The fountain on the left is a *Gargoyle Statue, Jinx It* After you smash all of the supports with the cauldrons, even the support in the gated area, youll get a *Large Shield* From the crest on the ground, go back down to the area with the walls. Destroy all of the walls to the right. Youll come to courtyard with 4 large statues, smash them with the cauldron and youll get a Go back up the ramp. *Small Shield* On your right walk until you reach a dead end, there will be a *Dark Detector, Jinx It* Go up the stairs and make a left. Go down the corridor and move the rocks out of your way. Follow the corridor until you come to an intersection. Take the corridor to your right. Open all of the gates and retract the bridge. After the 2nd bridge youll get a *Small Shield* Retract the next bridge and go up the stairs. On up the stairs to your right and then go left, there is a *Dark Detector, Jinx It* On your right go down ramp and there will be a*Gargoyle Statue, Jinx It* On the wall is a light post; next to it is an opening, go down the ramp. Go right and youll find a *Small Shield* Turn around and go up the stairs youll find a courtyard at the top of the stairs. In the courtyard you will see the large shield. You will first have to put out all of the fires, when you go near the large shield there will be an explosion and the shield will be engulfed in flames. You will then be attacked, kill everything. Put out the fire and get the *Large Shield* **At this point you should have: 4 Large Shields- Total from all Levels 7 Small Shields 4 Gargoyle Statues 4 Dark Detectors From the crest on the ground, go straight and make a left, go down the corridor, move the rocks and follow the corridor. Make a left at the junction and go down the stairs and go through the archway. You will come out facing a rod iron fence, go right and move the large block to the dead end and climb up. Youll be facing a pond with a large fountain in the center. Put out all of the fires and at the other end of the pond is a stone to step on, use the accio (Y), youll get a *Small Shield* Turn around and open the gate, on the right side is a *Dark Detector, Jinx It* Put out the large fire and youll get a * Small Shield* Move the block down to the other side of the courtyard and onto the platform. Climb up it and retract the bridges to get a *Small Shield* Move the large block through the opening and place it right next to the tree. Jump down and climb up wall, there will be a *Large Shield* From the crest on the ground, go straight. Youll get a *Large Shield* From the crest on the ground, go straight and make a left, go down the corridor, move the blocks and follow the corridor. Make a left at the junction and go down the stairs and through the archway. Put the large block at the wall and climb up. Put out all of the fires and go through the gate, put out the large fire and move the block, climb up. Retract the bridge and move the block through the opening and next to the tree. Climb up the wall, youll find a *Gargoyle Statue, Jinx It* ******The Large shield that is in the pond with the fountain can only be gotten once you complete the Prefects Bathroom and obtain the charm Herbivicus****** Moodys Challenges ****In each challenge there is a total of 500 beans. It doesnt mater what order you get them in, the total is always 500 beans.****** Dugbog Avifors Hit the Dugbog until it is on its back -levitate it- one of the others will hit it- when you see crows flying, that is the spell you need. You need to kill 10 dugbogs like that to complete the challenge. Gold- 350 Beans Silver- 100 Beans Bronze- 50 Beans Levitation Challenge Levitate the boulders and place them on the bulls eye- if a boulder falls off the tower the challenge is over. Gold- 350 Beans Silver- 150 Beans Bronze- 0 Beans Exploding Cauldrons Destroy all of the walls and the large statues. Make sure to get the large statue that is on the other tower. This one is difficult but it is possible. Gold- 350 beans Silver- 150 beans Bronze- 0 beans ****VANISHING CARD*** To get this card you also have to be fast. With the cauldrons first destroy the first wall in front of you, the card will be there. Get it fast or it will disappear. Bubotuber Fling This one is a little challenging. Fling the Bubotubers at the bulls eye. The closer the bulls eye the lower the points. Gold- 450 beans Silver 0 beans Bronze- 50 beans Tower Blocks This one is simple, stack all 5 blocks on top of each other. Dont worry the levitation is extended and as no problem with the 3rd, 4th, and 5th block. Gold- 450 beans Silver 0 beans Bronze- 50 beans Forbidden Forest *****VANISHING CARD***** After you get the initial large shield- From the crest go forward you have to be quick- the card is in the middle of a fungus patch. You have to be very fast, dont collect anything until you have gotten the card. You can also do this until you get the card On your right are 2 large boulders, move one of them and get a *small shield* Go past the bubotubers on your left, go to the right to find a *gargoyle statue jinx it* Retract the bubotuber and fling it so you can pass. On the tree stump there is a *small shield*- use accio (Y) to get it. Go around to the other side of the tree stump, follow the path and destroy the fungus by retracting and fling the bubotuber to get a *small shield* go back and follow the path you have to destroy the fungus to clear the path. The path will come to a dead end and on the right will be a wall and a platform. Climb up the platform and jump down the other side. The dragon will set the path on fire and you have to put the fire out to continue. Kill the dugbogs along the way; you will end up on the crest on the ground. From the crest go left. You will find a *small shield*In the middle of flames, put out the fire to get the shield. On the right hand side is a *mushroom jinx it* Pull tree out of the way and follow the path. You will come to 3 bubotubers and on the right will be fungus, kill the fungus with the bubotubers and get the *small shield* Take the path to the left, go past the tree branch and youll see a gargoyle statue jinx it* Continue on the path, kill the fire salamanders, on the right is a *mushroom jinx it* You will see a wall and an entrance; go through it and up the stairs. Youll find another *small shield* Follow the stairs and put out the fires. Go across the log, kill the dugbogs and on the left is a *mushroom jinx it* Continue forward, you will have to fight a skrewt- after you defeat it you will get a *large shield* At this point you should have: 8 large shields- total from all levels 6 small shields 2 gargoyle statues 3 mushrooms From the crest on the ground, go right and follow the path until you see a shield suspended in the air. In order to get this shield you have to get a large block to climb up. Go back to the crest. Follow the path and get rid of the fungus. Go straight until you are facing 3 bubotubers. Take the path on the right; youll see the large block. You have to levitate the block down the path back to the crest. Once you get back to the crest go left to find the shield suspended in the air. Place the bock as close to the shield as possible. Climb up and get the *large shield* From the crest on the ground, Take the path to the left and it until you get to a platform, climb up. You get a *small shield* Jump down the other side, take the path to the right; you will come to a wall with a hole in it, go through the hole. Kill the fungus patch on the left with the bubotuber. Go forward, on the left side youll find *mushroom, jinx it* Continue on the path, youll pass 3 bubotubers and then youll come to a clearing and a skrewt-kill it. DONT GET THE LARGE SHIELD RIGHT AWAY! Go to the left to get a *small shield* You will see 3 bubotubers, find rocks and put them right on the bubotubers. Pass through them to get a *gargoyle statue, jinx it* Now get the *large shield* From the crest on the ground- take the path behind you; follow it until you see a platform- climb up it. Jump down and take the path to the right- you will come to a wall with a hole in it- walk through the hole. Kill the fungus patch on the right go down the path. Kill the fungus patch by the three rocks; continue on the path until you come to a tree in the middle of the path. There are several bubotubers, go left, kill the fungus. You will come upon 1 single bubotuber and you will see a small patch of fungus on your left. Kill the fungus and go through the small path. Turn to the right and you will find *mushroom, jinx it* Turn around and you will see a large block and the dragon will be spitting fire at you, use the block to hide from the fire. DONT GET THE LARGE RIGHT AWAY! Go to your left and you find a large fungus patch, kill the fungus and you will find a *small shield* On the right is a *gargoyle statue, Jinx it* Then get the *large shield* From the crest on the ground- take the path behind you; follow it until you see a platform- climb up it. Jump down and take the path to the right- you will come to a wall with a hole in it- walk through the hole. Kill the fungus patch on the right go down the path. Kill the fungus patch by the three rocks; continue on the path until you come to a tree in the middle of the path. On the left is a *large shield* *******There are 3 large shields can only be gotten once you get the Herbivicus charm***************** At this point you should have the following: 12 Large Shields- Total from all levels 10 Small Shields 5 Mushrooms 4 Gargoyle Statues (looking for the 5th) Triwizard Tournament Task 1- Dragons To go fly faster press both R button and the X button Gold- 3 Large Shields Silver- 2 Large Shields Bronze- 0 Shields Prefects Bathroom *****VANISHING CARD****** You have to be fast to get these cards. You get this card after you initially after you get the egg. You will start on the crest, you need to go to your left- kill the salamanders fast and pull down the bridge, you will see the card between the 2 fish statues. The good news is that you can do it several times until you get the card. After you drop the egg- Across the tub next to the fountain is a Gargoyle statue, Jinx it* Destroy the wall between the cauldrons and go through it. Youll end up in a room with water pipes. Go straight and pull the bridge down and go across it and destroy the large cylinders and youll get a *Small Shield* Go back and with the cauldron destroy the 3 pipes in the walkway. Continue until the end and make a left and climb the wall and go left. Youll climb 2 walls and when you get to the platform use the cauldrons and destroy the large cylinders; break the cylinder on the next platform. Pull down bridge and climb wall, go left and youll get *Small Shield* Go right and pull water tap- kill erklings- Jump down onto the bridge and platform, go slightly left and go across. Pull down bridge and Climb the wall. Pull all of the water taps and destroy all of the cylinders, youll get a *Small Shield* Kill erklings and use cauldron-drop it off plate form, to destroy 3 pipes below. Jump down and go left continue down the walkway, at the dead end make a left and then a right. Jump up the platform and to your left break the cylinder to get a *Small Shield* Pull down bridge and cross it, climb up the wall and youll end up on a platform with 2 water taps and a cauldron. Use the cauldron to break 2 cylinders that are down below, they can be a little challenging. Jump down on the bridge and on the other side of the platform go slightly left and jump down. Go left and follow the walkway and the go left and go right down the stairs. At the bottom is *2 Small Shields* Go forward and continue down the walkway and at the courtyard are fire salamanders- kill them- by the cauldron is a *Gargoyle Statue, Jinx it* Your standing on a crest, turn to your left and there is another *Gargoyle Statue, Jinx it* Pull down bridge and break the cylinders to get a*Small Shield* Continue on and pull down the bridge and cross it, climb up the wall and on your left jump off, go forward and slightly left. Kill fire salamanders To get the egg you need all 3 characters to pull on it, it will shoot up the drain back to the tub. You have to go back, kill the fire salamanders and put out the fires. (If you put out the fires quickly, only a few salamanders come out) on your left there are a series of bridges pull them down. Go back and go across the bridges and up the wall. On your right jump down and go to your right, go forward and climb up another wall and turn to your left. Climb another wall and turn left-there are 3 fishes on the walkway- go straight and climb wall. On the platform go forward and you will see the hole in the wall you made that leads to the bathroom, go through and claim the egg and a *Large Shield* The amount of large shields depends on how many shields you get from the Tournament task- Dragons. At this point you should have: Large Shield- 15 or 16- Total from all levels Small Shield- 5 Gargoyle Statues- 3 Taps- 0 And pull down bridge. Cross the bridge and up the stairs- put out the fires and kill the salamanders. Make sure to destroy all of the large cylinders you will find *2Small Shields* Move the large water tap and go down the stairs and at the bottom is a *Small Shield* Pull down bridge and charm the wall on the right this statue is hard to see to get a *Small Shield* Pull down another bridge and follow the path and get a *Large Shield* From the crest go straight and get a *Large Shield* From the crest go straight until you get to the cauldron, kill erklings and use cauldron-drop it off platform, to destroy 3 pipes below. Jump down and turn back go down the stairs to your left, jump down. There are wooded platforms on your right, jump down both platforms. Youll find a large block, move it up the platforms and to your right there is a walkway with a wall and large shield move block to the wall and climb up to get the *Large Shield* From the crest go right and continue forward go up the stairs and then turn left, pull down stairs and go up the stairs. Put out fires and kill fire salamanders, pull the large water taps. Right before you reach the stairs on your right is a *Tap, Jinx it* The amount of large shields depends on how many shields you get from the Tournament task- Dragons. At this point you should have- Large Shields 18 or 19 Total from all levels Small shields- 10 Taps- 2 Gargoyle statues- 5 You can continue only with the Herbivicus charm Hint- Use Herbivicus charm to open all flower buds to increase your skill. Exit level- you can only continue if you have the Herbivicus charm which you get from the Herbology level Triwizard Tournament Task 2- The Lake This task is like the dragons, hold down the right button and get the gillyweed which makes you go faster. You can use your wand to charm away the merpeople and the walls you encounter, this is a long task. Gold- 3 shields Silver- 2 shields Bronze- ? Herbology ****VANISHING CARD*** To be added To Get the Spell Book- Go down the stairs and follow it around, go down 2nd flight of stairs on you right is a *Gargoyle Statue* At the bottom on the left shoot charms at the right iron gates and youll get a *Shovel, Jinx It* Then go right into a courtyard, go left and youll see a *Shovel, Jinx it* Pull open gate and youll find a circular shrine with the spell book, get the spell book. This is the Herbivicus charm. Go around the circle and youll get *Small Shield* Go back and youll pass the flower beds and the large shield in the fungus patch. Go up the stairs and do a Herbivicus charm- go up both flights of stairs and go around walkway- go down the stairs and at the bottom is a *Small Shield* Continue on the walkway and down the stairs **The vampyr mosp attack you any time you use the Herbivicus charm* Open the lilies to your right, youll see a wooden walkway- fling the bubotuber walk past- charm the lily and on the other side is *Small Shield* Go back Charm the 2 lilies- then charm 2 lilies straight *Not going towards stairs* At the pole go right charm 4 lilies- there is a work area go straight and get*Small Shield* Go back to the pole and charm 1 lily and use bubotuber to clear the walkway of a fungus patch. Go back and charm 2 lilies on your right, there will be a wooden walkway with a large flower bud charm it and for a short time the wasps will be drawn to it. Pull down the bridge from above- go back and charm the lilies on your right to the stairs. Go up and cross bridge, charm the 3 lilies and pull down stairs-go down stairs and follow walkway around and go up stairs- charm 2 buds and follow the walkway, go down the stairs- at the bottom of the stairs- under the stairs*Small Shield* On the wooden fence to your right is*Shovel, Jinx It* Open gate and kill the Skrewt- go across courtyard and up the stairs*Small Shield* Follow the walkway- go right and pull down bridge- go back and turn right following walkway- at dead end go right- go through greenhouse and follow walkway. Go up the stairs and open lilies destroy both large statues- pull open the gate and go through- there is*Small Shield* Go down stairs and on the left side of the courtyard under the large branch is *Shovel Jinx It* Go into greenhouse and go up the stairs at the very top is the large shield- go around the platform and youll find*Small Shield* To get the large shield you have to destroy the large planter hanging in the center with the cauldron. The planter will fall to the bottom, go back down the stairs- Put out fire and get the*Large Shield* And*Gillyweed* The amount of large shields depends on how many shields you get from the Tournament task- Dragons and the Lake Task. At this point you should have 20 or 23- Large Shield Total from all levels 8- Small Shields 1- Gargoyle Statue 3- Shovels 2- Boxes From the crest go up stairs and follow them around-*you are going back to where you got the spell book* Go up and then down over the bridges and charm the buds- youll get to the pond- charm the buds to your right to get back to the work area. Continue on going up and down stairs- youll get to the courtyard with the several flower beds. One flower bed has the shield suspended over a fungus patch. Straight across from the fungus patch is a bubotuber- use it to kill the fungus patch and get the*Large Shield* From the crest go up stairs and follow them around-*you are going back to where you got the spell book* Go up and then down over the bridges and charm the buds- youll get to the pond- charm the buds to your right to get back to the work area. Continue on going up and down stairs- youll get to the courtyard with the several flower beds. Go past these flower beds and open the gate- you will be back to where you get the spell book- on the side of the building is a shield- to get it you have to destroy the top of the wall with the cauldron- then charm the buds and walk down to get the *Large Shield* From the crest turn around and open gate. Put a rock into the hole in the courtyard to that the wasps wont come out. Move all of the rocks away from the stairs on you far left corner. Move the big block up one flight of stairs, climb up and charm the buds to get a *Large Shield* From the crest turn right and open gate. Put a rock into the hole in the courtyard to that the wasps wont come out. Move all of the rocks away from the stairs on you far left corner. Continue on path and then turn left into archway. Go up the flights of stairs and charm buds go in and out of the greenhouse and on your right is a set of stairs- go up. By the large statue on the right is *Statue, Jinx it* Pull open gate and go down the stairs- there is a shield behind 3 bubotubers that cant be flung. Go on the far left and levitate the cauldron- destroy the bubotuber to get the *Small Shield* There is a fungus patch- kill them to get the *Large Shield* From the crest turn right and open gate. Put a rock into the hole in the courtyard so that the wasps wont come out. Move large block and go into tunnel- youll be facing a pond- open all of the buds and get the *Large Shield* From the crest turn right and open gate. Put a rock into the hole in the courtyard so that the wasps wont come out. Move large block and go into tunnel- youll be facing a pond- open all of the buds- go up the stairs and through a tunnel, go straight and past the greenhouse corner. Turn right and pull down bridge- go across and make a left- youll get the*Small Shield* Go forward and at the corner pull down bridge- you have to go in and out of the greenhouse pulling down bridges. Go back and at the end of this is the*Large Shield* From the crest go up stairs and follow them around-*you are going back to where you got the spell book* Go up and then down over the bridges and charm the buds- youll get to the pond- charm the buds on the right to get back to the work area continue on- go down stairs and go into the greenhouse building- go all the way up to the top and next to the cauldron is the *Large Shield* Herbivicus Charm You have to go back to the other levels to get all of the shields for that level. Hogwarts Exterior- 1 Large Shield Forbidden Forest- 3 Large Shields Prefects Bathroom- 3 Large Shields Hogwarts Exterior-1 Large Shield From the crest on the ground, go straight and make a left, go down the corridor, move the rocks and follow the corridor. Make a left at the junction and go down the stairs and go through the archway. You will come out facing a rod iron fence, go right and move the large block to the dead end and climb up. Youll be facing a pond with a large fountain in the center. Use the Herbivicus charm on the lily buds. Cross to the fountain and get the *Large Shield* Forbidden Forest- 3 Large Shields From the crest go behind you and go down the path- kill the fungus patch and go through the hole in the wall. Go up the stairs and pull out fires. Follow the walkway around, walk over large tree and to your right. Continue on until you see the shield. Charm the buds that lead to the shield and climb up to get*Large Shield* From the crest go to the left and continue down the pathway, there will be a platform- goes up it and jump down at the other end. Continue on the path and you will come to a wall with a hole in it- go through it. Go right and kill the fungus patch- continue on path and you will come to skrewt- kill it and put out the fires. Next to the 3 bubotubers is a lily ladder, charm the lilies and go up- you will find another skrewt- kill it*watch out for the wasps* The shield will drop down- get the*Large Shield* From the crest go to the left and continue down the pathway, there will be a platform- goes up it and jump down at the other end. Continue on the path and you will come to a wall with a hole in it- go through it. Go to your left and follow it around-youll get to stomp-go left and kill the fungus patch. Go a little farther and on youre your left is a small fungus patch- kill it and go through the opening, You will find the dragon spitting fire at you. Use the block to hide behind it to block the fire. Go to your right and there is a bubotuber and up the hill a little bit is a fungus patch- kill the patch and go up. When you get to the top of the hill there is a lily ladder- charm the buds and climb up to the top of the dragons cage to get the*Large Shield* Prefects Bathroom From the crest go right and up the walkway, continue past the fish water taps go up the stairs to turn off the water taps. Pull down bridge and go across-up the stairs. Put out the fires and pull large water taps- go back down the stairs and follow the walkway to the bottom of the stairs. There are lily buds and a fish tap- charm the buds that lead you to the wooden platform. From the platform- go right to charm the buds and on the walkway go up the stairs. Pull the large water taps and then go back to the wooden platform- charm the buds to get to the wooden platform and get the *Large Shield* From the shield go right and follow walkway to the first set of buds you come to. They lead to a stone platform- charm them and charm 1 lily on your left to get to the stairs. Pull both large water taps and go back. Follow the walkway and up the stairs- pull down bridge and up more stairs. Put out fire and pull the large water taps and go back. Charm the buds leading to the wooden platform- go right to the walkway and go up stairs to pull large taps- go all the way go all the way back to the stairs- go up the stairs and continue on until you reach the top- on the far left corner are stairs- go down and get the*Large Shield* From the crest go left and follow the path-climb up and pull bridge down. Follow the walkway- dont turn just go straight. Pull down the bridge and on your side are 4 bridges- pull them all down- climb up and then immediately go right and cross all of the bridges- youll go down 3 times, charm all of the lilies and go the *Large Shield* At this point you should have 34 or 37 Large Shields Triwizard Tournament Task 3- The Maze Go through the maze when you reach the courtyard, Cedric will be tied to the bushes. ****To kill the secret it has to run into the hedges and makes it dizzy***** When it is dizzy charm it, throw rocks at it, just so you kill it. When youve killed both skwerts Cedric is released from the bridge and you both touch the Triwizard Cup together. ***********You dont receive any shields for this one************* Voldemort To begin with you have to kill skeletons- when youve killed them all- you and Voldemort will lock wands and you have to kill more skeletons with the wand beam- next he breaks out the statue. The faster you destroy it the quicker you beat this level- GAME OVER


