Episode Guide - Guide for Macross M3
- Cheats |
- Unlockables |
- Hints |
- Easter Eggs |
- Glitches |
- Guides
Scroll down to read our guide named "Episode Guide" for Macross M3 on Dreamcast (DC), or click the above links for more cheats.
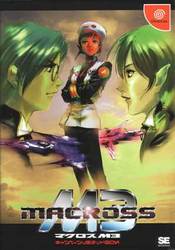
MACROSS M3
Import Dreamcast

Episode Guide

Version 1.0
March 17, 2001

(c) 2001 Edward Ju, All Rights Reserved.


* Introduction

This is a quick and dirty guide I've slapped together for the express
purpose of helping those who are playing the game for the first time and
were stuck on a level they cannon clear.  I do not have the luxury of
taking the time to write a full-blown FAQ or walkthru, so if you have
any specific questions on a particular level, feel free to e-mail me at
[email protected] and I will add the answer in a revised version of this
guide.  As of now, Version 1.0 pretty much covers all the known missions
from all 8 Episodes.  There are some additional information that I may
decide to throw in later if I have enough time, but this version pretty
much contains everything you need to know to pass each level.  This is
the third release of the Episode Guide.  Version 0.6 contains only the
first half of the game.  It is a revised version of the first release
(Version 0.5), and contains several corrected mistakes, rewritten
passages that aim to make things clear, and the addition of the
Executive Summary section (for the benefit of those who just need to get
to the point immediately).  This work-in-progress is becoming more
formalized than the quickie guide I have originally envisioned.

I call this guide an Episode Guide because that's how the game refers to
groups of levels, or missions.  Sometimes an Episode can contain only 1
mission, sometimes the game would decide to give you a full-course meal
of 3 linked levels.  The game unlocks certain levels within an Episode,
although I haven't been able to nail down what triggers their release
other than the observation that they appear to be time-released like
Tekken characters.  You just need to play through all the Episodes a few
times before all the levels are released.  The implication is that you
need a memory card with sufficient room, otherwise you will need to
start from scratch every time you boot the game.

Each unlocked level becomes playable in Free Mission mode.  However, the
tips contained in this guide are written for players dealing with the
level in Story Mode (by beginning a New Game or Load a saved Game via
the VMU).  If you are playing the level in Free Mission mode, the
strategy here will work equally well, but you almost always have better
plug-ins and variable mechs available then what I recommended here, and
pilot selection will not be an issue there.

* Distribution

Feel free to pass this along to fellow gamers, but I reserve the
copyright and other related right to this guide.  That means you should
not alter the contents of this document without permission, even if it
contains misspelling and bad grammar.

You are not supposed to profit from distributing this document, be
prepared for the worst if I find out that you do.

* Valkyrie Overview

Model #   Plug-in slots   Simultaneous missile lock-on (standard #)

VF-1J     3               2
VF-4      4               3
VF-3000   5               3
VF-5000   6               4
VF-9      5               3
VF-14     7               5
V. Graug  6               N/A (no lock-on missile available)
VFX-11    7               7
YF-19     8               7
YF-21     7               8

According to the game's official site, the VF-14 was developed with
mobility in outer space in mind.  The Max version appears on the game's
cover.  The VF-9, featuring a forward-swept wing, is a mass-produced
Valkyrie with superior aerodynamics.  It was later succeeded by the VF-
19.  A Millia custom of the VF-9 appears on the game's cover as well,
along with the Variable Graug and the Max custom VF-14.

Note that the Variable Graug is not equipped with homing missiles,
therefore even if you install 2 sets of extra missile plug-ins, it will
not fire any homing missiles even though the HUD shows 2 are available.

The YF-19 and YF-21 from Macross Plus are unavailable in Story Mode and
only selectable in Free Mission mode after you have entered the correct
passwords for each Valkyrie in the Internet Mode's Password section.

* Plug-in Overview

The 12 known plug-in modules are listed, from top to bottom, as they
appear on the selection screen going from left to right:

# of slots required  Plug-in name and function

1                    Booster Upgrade – booster lasts longer

1                    Lock-on Speed Upgrade – faster lock-on

1                    Terrain Protection – Fighter takes less
                     damage from hitting terran

1                    Mobility Upgrade – more maneuverable

2                    Shield Upgrade – shield lasts longer

2                    Missile Upgrade – bigger damage

2                    Gunpod Upgrade – bigger damage

3                    Extra Missiles – get an extra missile
                     for every 3 available missiles, limited to 10

3                    Lock-on Range Upgrade – lock-on further targets

3                    ECM – slows down enemy reaction

4                    Music – plays the Minmay pop song "Shao Bih Long"
                     (Little White Dragon) and causes confusion and
                     reduced morale in the ranks of Zentradi forces,
                     causing them to send out less combat units and
                     fight less ferociously

5                    Music – plays the Minmay song translated from the
                     artifact found in the Do You Remember Love movie.
                     Effect on the Zentradi is more powerful than the
                     Little White Dragon song, at a cost of an extra
                     plug-in slot

Note that many of these plug-ins can be made more powerful by multiple
installation, if your Valkyrie has enough empty slots to take them.  For
example, installing the Extra Missile plug-in twice will get you even
more missiles than what you get from a single installation.

* How to Use This Guide

The Executive Summary section lays out the pilot, Valkyrie, and plug-in
selection that I have found to be useful – it is not a be-all-end-all
setup, so you are free to experiment with different combinations.
However, if you are stuck on a level, I highly recommend you try what's
worked for me by going with the recommended setup.  It doesn't really
matter which pilot you choose if you just want to "go to the next
level", but the ones I recommend are based on who I had chosen when I
got the good ending.  The third pilot, Moa, is a captured Zentradi who
still has issues with fighting against her own kind, therefore it is
best to use Max in Episodes where you will be facing off Zentradi units,
because you will get a bad ending if Moa is not happy.  I am also not
sure if you can get a good ending if you do not unlock all levels.

The Executive Summary also sums up the basic strategy you need to use in
order to clear the level without being destroyed or running out of time.
I recommend reading the Detailed Guide section if you are already stuck
on a particular level, since you are more likely to find specific
pointers that directly address your problem.

You can consult with the Valkyrie and Plug-in Overview sections above at
the beginning of each Episode, they should come in rather handy.

* Episode 1 – Destroy All Enemy Squads

Executive Summary:

Pilot: either Max or Millia
Valkyrie: VF-1J (only possible choice)
Plug-ins: booster upgrade x 3
Basic strategy: gun down incoming wave using gunpod (press A quickly and
repeatedly), and use special all-out missile attack to clean up the
remaining few pests (X-Y-X-Y-A action command).  Go with Battroid or
Gerwalk mode.

Detailed Guide:

Pick either pilot (Max or Millia).  VF-1J is the only Valkyrie
available.  I believe you only get the booster upgrade and terrain
protection (its icon shows a fighter flying into a mountain) plug-ins
here, so just go with boosters all the way (you'll be skybound, no point
in installing terrain protection plug-in for this mission when there is
nothing other than moving targets for you to fly into).

Use your gunpod (press A repeatedly instead of holding it down) to take
out each wave of enemies that come at you as they are appearing.  You
can knock out a good percentage of them that way.  Contrary to what you
might have learned from flight simulators, the Valkryie's gunpod here is
rather accurate and powerful.  Sometimes they are more effective than
missiles, you just need to figure out which kinds of enemy units are
more vulnerable to the gunpod, and which ones are easier to kill with
the missiles.

Alternatively, you can use the multi-missile tactical attack by pressing
X-Y-X-Y-A (you will need five filled segments from the Action Point bar,
located at the lower left side of the screen, in order to execute it) as
the enemy units are entering the area.  You will know that you did it
correctly if you see your Valkyrie transform into Battroid (robot) mode
and start shooting out tons of missiles from its back.  If your Valkyrie
is firing its gunpod instead, then you've just performed the X-Y-A
action, which is sort of useless, and wasted 3 Action Points.

In order to get enemy units in your line of sight, observe the yellow
triangles that go around the large green circle on your HUD.  As you fly
around, you will see them spin around the circle.  You want to try to
put their triangular representation on top of the green circle, so you
can see them actually inside the green circle and fire at them.

Once they start to engage you and fly around you, it's time to transform
into either Battroid or Gerwalk form and start to track them.  Try to
nail them with the gunpod or missiles.  Ammo is unlimited, so just keep
firing even though nothing's inside the green circle yet.

You can fire missiles by holding down the A button for a while and then
release when you acquire a lock-on, which is done by following a target
and placing it within the large circle on your HUD.  Once the circle
turns from green to red, it means missile is ready to launch, and if you
hear the lock-on tone, you should release the A button before you lose
the lock-on.  The longer you can hold the A button while maintaining a
lock-on, the more missiles you can lock onto the target (subject to the
number of missiles your Valkyrie can simultaneously lock-on).  The VF-
1J, unfortunately, can only lock-on to a maximum of 2 missiles at a time
unless you install the extra missiles plug-in, which is not available
for this episode.

A good strategy for this episode is to spray enemy units with gunfire as
they are entering the combat zone.  When you have successfully trimmed
them down and it becomes a dogfight, use the X-Y-X-Y-A special missile
attack to hit the remaining units which are hard to lock-on.  Engage in
dogfight if the all-out missile attack doesn't kill off the remaining
units of the wave and wait for your Action Point bar to refill, then
repeat the special missile attack.  You should be able to defeat all
waves within the time limit using this pattern.

* Episode 2 – Destroy Enemy Fighter

Executive Summary:

Pilot, Valkryie, and plug-ins are carried over from Episode 1.
Basic Strategy: use a combination of gunfire and X-Y-X-Y-A all-out
missile attack to finish off the only enemy unit.

Detailed Guide:

Technically, this should be Episode 1-2, because you are not returned to
the ship for new briefing.  You are basically given a new mission
objective to destroy the escape plane of a spy.  This is a hidden level
and does not always get unlocked, so you may not get to play this level
at all.

There are no waves of enemy units, just 1 unit that you must destroy.
It will not sit there and take your abuse, instead it will fire homing
missiles at you.  In fact, that is the first thing it does as you are
entering the combat zone, so you will need to either dodge them or just
take a few hits so you can get down to business sooner.

A few all-out special missile attacks (X-Y-X-Y-A action command) will
take care of it, unless you want to practice your gunnery skills.  Just
make sure you don't run out of time.  Change into battroid or gerwalk if
you have a hard time tracking of your enemy in Fighter mode.

* Episode 2-1 – Fly Through the Canyon

Executive Summary:

Pilot: either Max or Millia (I used Max to get the good ending)
Valkyrie: VF-4
Plug-ins (in order of preference/importance): booster upgrade, shield
upgrade (if available), terrain protection, gunpod upgrade (if
available)
Basic strategy: stay in Fighter mode, use booster when there aren't
mines nearby and use the X-X-A chaff/flare escape when you are being
locked-on by homing missiles.  Try to get to the end of the canyon as
soon as you can and avoid wasting time engaging targets.

Detailed Guide:

Like all married couples, Max and Millia were spending some quality time
at yet another session of domestic dispute.  Suddenly, duty calls in the
form of a scramble siren.  Pick either pilot.  I usually go with Max,
since he will be facing off against a Zentradi pilot later (more on this
topic later).  You should also have the VF-4 unlocked by now, I usually
go with it, although you can go with VF-1J if you are used to how it
handles (the VF-4 behaves a bit different than the VF-1J, but the extra
missile and plug-in slot helps).

By now, a few plug-ins should have been unlocked.  You can pick these if
they are available:

- booster upgrade (take at least 1)
- shield (icon shows the fighter in center of a sphere, generally not
  available, but if you see it, take it)
- protection from terrain (if you have enough slots, take 1)
- gunpod upgrade (icon shows a bigger gunpod over a smaller one, highly
  recommended)
- missile upgrade (icon shows a larger missile over a smaller one, not
  necessary)
- extra missiles (icon shows a bunch of missiles, not necessary)

I usually go with a booster upgrade, a terrain protection, and either
the gunpod upgrade or the shield upgrade, depending on which one is
available.  The most important plug-ins are the booster and the shield,
if available.  If you don't see the shield plug-in, get a terrain
protection.  A gunpod upgrade should also be used, if available.

This level requires you to fly through a canyon.  Time is your greatest
enemy.  Your other headache is the barrage of homing missiles on your
tail (you'll hear the siren and see the word "WARNING!" on the HUD,
warning you of approaching missiles).  Here you must master the other
important tactical action command: X-X-A.  It drops chaff and flare to
bail you out of homing missiles, and will come in very handy here.  This
action depletes only two segments from the Action Points bar, so you can
do it again immediately or relatively soon.  Just make sure that your
Valkyrie is not heading to the ground or a cliffwall when you perform
this action, because you do not have control of the Valkyrie when the
action is being performed.  When you regain control of your Valkyrie,
you don't want it on the brink of hitting the ground or cliffwall,
causing the shield to deplete or destroy your Valkyrie, if the shield is
gone.

Stay in Fighter mode as much as you can – it may be a bit disorienting
at first, but if you have played Air Combat (aka Ace Combat for Japanese
original version) on the PlayStation, then this level should be a total
piece of cake.  In fact, it is possible to finish this level entirely in
Fighter mode.  Use your booster whenever possible to make your trip
proceed faster.

In this level, you will encounter 2 kinds of obstacles (besides the
cliff walls and the ground, which are hurtful if your fighter flies into
them): mines and turrets.  The mines just float in the air, waiting for
you to fly into them so they can detonate and drain your shield.  You
can use the gunpod to shoot them, but be warned that you need to get
them to blow up twice before they are rendered harmless.  Best to avoid
getting close to them at all, because most of the time they are already
in your face by the time you get one to blow up for the first time.

The turrets fire homing missiles at you.  You can lock some missiles on
them to take them out, but a few well-timed chaff/flare action (X-Y-A)
works beautifully to bail you out of the hot zone.  Remember, your goal
is to fly to the other end of the canyon, and spending time blowing
stuff up is not on top of your priority.  When you fly, make sure that
you don't fly too high – there is an invisible ceiling.  If you get too
close you will see a warning on screen that says you are about to leave
the combat area, and the game will forcibly transform your fighter to
Battroid mode so you'd drop to the ground.  Not a good thing to happen
if you are flying through a buttload of turrets and/or mines.

In short, avoid collision, stay in Fighter mode and fire up that booster
often, avoid flying too close to the mines, and chaff/flare whenever you
hear a lot of WARNING! beeps.

* Episode 2-2 – Destroy Enemy Intelligence Facility

Executive Summary:

Your pilot/Valkyrie/plug-ins carry over from the previous level.  Here's
where your shield, booster, and gunpod upgrade plug-ins really shine.
Basic strategy: primary goal is to destroy all red-flagged Targets,
shaped like a giant antenna.  Enter the complex in Fighter mode,
transform to Gerwalk when engaging the opposition.  Pick off the
guarding turrets and Destroids by hopping/jumping (using the booster)
while moving left and right unpredictably, then destroy the nearest
Target before rushing (Fighter mode and a bit of booster) to the next
Target area.  Act as fast as you can, do not waste too much time using
lock-on or special missile attacks – for the time they cost you, the
gunpod is much more efficient.

Detailed Guide:

This is an unlocked level, you may or may not get it.  Be happy if the
game sends you to Episode 2-3 after you complete 2-1, because this is
one of the toughest levels, and takes a lot of practice.  However, I
believe you need to unlock and beat this level in order to get a good
ending.  So grin and bear it if you do end up here.  I spent a whole
night here before I figured out a working strategy to clear it.  Don't
get frustrated if you run out of time often – play through this level a
few times so you can get a mental picture of the structure's layout and
where the Targets are.  Once you know where they are, it will help you
complete your task faster.

You start outside a building complex.  Your goal is to destroy the
enemy's intelligence facility, namely the antenna-like radar dishes
located inside the complex.  They are marked red on your HUD as TARGET,
and you cannot lock onto them using the missile.  That's where your
gunpod upgrade comes in handy.  Without the plug-in, you will be
spending more time on destroying these targets (I think there were 5 in
all) and time is once again your greatest enemy here.

Missiles, even special full-out attacks, aren't terribly effective here.
You need to fire your vulcan like mad at moving targets (Destroids) and
turrets that are protecting each antenna, and keep moving wildly so they
cannot hit you.  The Destroids can get you with their guns if your
movement is limited to hoving left and right in Gerwalk mode, so use the
booster often and make yourself hard to track or lock-on.  Don't even
try this level in Battroid mode, it is too slow for the pace of this
level, not to mention the lead salad your Battroid would be getting is
no good for your health.

Start by transforming into Fighter mode and fly into the complex.  Pick
a red Target, fly there (position the red triangle on top of the green
circle and fly in a straight line), and visually confirm the posted
guards so you can pick a spot to land without being surrounded.
Transform to Gerwalk mode and start firing your gun at the guards –
these include at least 1 turret and a couple of Destroids.  They are
tough customers and if you want to lock missiles onto them, it'd take a
long time.  Quick-firing gunpod takes less time to blow them up.  Try to
take out the turret first if you can, so there will be no homing
missiles after you.  When you are attacking the Destroids, try to move
around a lot – swing left and right while jump up and down using the
booster.  This makes you hard to target so your shield will last longer.
Hop around and fire like mad, once you take out the guards you can fire
at the red Target unmolested.  As it is blowing up, transform to Fighter
mode and rush to the next Target area, repeat the process of picking off
Turret and Destroids until you blow up all the red Targets.

If you have enough shield left (indicated on the bar on the lower right
side of the screen) when you only have 1 Target remaining to be
destroyed and time is running tight, you can just shoot the Target
instead of trying to clear the area of guards.  As long as you keep
moving and jumping around while shooting at the Target, you can do it
without being shot to a piece of Swiss cheese.  Just make sure the
Target stays inside the big green circle while you are moving around and
firing.

In short: hop a lot while swinging left and right constantly as you
attack the guards, and move as fast as you can between Targets!

* Episode 2-3 – Disable Unidentified Zentradi Fighter

Executive Summary:

Pilot/Valkyrie/plug-ins are once again carried over from 2-1 and 2-2.
If you have missile upgrade or extra missile plug-in, they will make
this level easier, but you don't need them to win this level.
Basic strategy: show no mercy, X-Y-X-Y-A all-out special missile attack
whenever you have 5 or more Action Points on the AP bar.  Fire your
gunpod like mad while the Action Points are regenerating, and keep
moving so you're not a still target.

Detailed Guide:

After the tough levels of 2-1 and 2-2, you are rewarded with a one-on-
one with a Zentradi Variable Graug, which flies and attacks like a freak
on speed.  By the time you got a lock-on and are ready to fire, the
bastard is already behind you pumping lead into your back.

Not to worry!  Use your X-Y-X-Y-A all-out special missile attack.  Fire
your gun blindly while your Action Point bar refills, because the Graud
flies around so fast and crazy you are bound to get some licking in as
it gets in front of you and try to shoot you at point blank range.
After a few all-out missile attacks, victory should be yours as you
carry out your order to disable the enemy and capture it along with the
pilot.

The pilot turned out to be a Zentradi female named Moa.  Max and Millia
decide to make her a micron (human-size her) and adopt her as their own
daughter.  This family is where the game gets its name "M3" from (Max,
Millia, and Moa).  As a side note... whatever happened to Mylene, their
baby daughter seen in the original Macross TV series?!

* Episode 3-1 – Clear All Enemy Squads

Executive Summary:

Pilot: Max (after all, it's the guy's duty to protect females)
Valkyrie: VF-3000
Plug-ins: shield, missile upgrade/extra missiles/gun upgrade, lock-on
speed upgrade/mobility upgrade.
Basic strategy: all-out missile attack action command (X-Y-X-Y-A) and
gunfire/missile lock-ons while you recharge the Action Points.

Detailed Guide:

Your mission is to escort the newly developed VF-5000.  I picked Max for
this mission to get the good ending, and flew the VF-3000 (which usually
is unlocked by now, the VF-9 is sometimes unlocked at this point as
well), which has 5 plug-in slots.  Play around with the available plug-
ins you find suitable to your style,

Since this is a space mission, don't waste your valuable plug-in slots
on terrain protection.  I think a shield upgrade (if available) and
missile upgrade are very helpful here, you can put either the mobility
upgrade or lock-on speed upgrade for the remaining slot, depending on
your playing style.  If you don't feel like bothering with trying to
lock-on enemies, then get the mobility upgrade.

If the Minmay plug-ins are available, you might want to consider them –
their icons appear as musical notes.  One of them takes up 4 slots, and
the other one takes up 5 slots.  The Minmay plug-in plays one of her
songs and sends protoculture shock across Zentradi enemy ranks, causing
them to lose their morale and will to fight, thus sending out less
attack units.  The later waves of this mission contained Zentradi units,
so a Minmay plug-in would help.

This Episode plays very much like Episode 1, just use the same strategy
and rely on a combination of special all-out missile attack and the
gunpod firing or locking-on missiles, and you will do fine.  Stay in
Battroid mode or Gerwalk mode if you need to track your opposition for
gunfire or lock-on missiles.

* Episode 3-2 – Defeat Enemy Reinforcement

Executive Summary:

Pilot/Valkyrie/plug-ins are carried over from previous level.
Basic strategy: same as the previous level.

Detailed Guide:

This is one of the hidden, unlocked level, so you might not always get
this level.  I have not been able to get a good ending without unlocking
this level, though.

The opposition has sent reinforcement, and these are tougher customers
than the lame-o units you just dealt with in the previous level.  Do the
same thing you did in Episode 3-1 while being careful not to stay a
still target, as the enemies are more active and aggressive now.

* Episode 4-1 – Fly Through the Canyon

Executive Summary:
Pilot: Moa
Valkyrie: VF-5000 (if available, otherwise pick VF-9 or VF-3000)
Plug-ins: booster upgrade, shield upgrade, missile upgrade, lock-on
speed upgrade or terrain protection
Basic strategy: same as Episode 2-1, but you must transform to Gerwalk
mode when you come upon a beam gate and destroy at least the lowest row
of beam activators before you can hover under the other rows of beam
barricade.  X-X-A when homing missiles are on your tail and there are no
obstacles in front of you.

Detailed Guide:

This one is very similar to Episode 2-1, but tougher.  While Episode 2-1
can be finished without any attacks or transformation, that's not the
case here.

There are no Zentradi units in this Episode, so it's a perfect one to
send Moa out for some action.  I think the best unit unlocked at this
point would be the VF-5000.  Take that even if Moa's Variable Graug is
available – the Variable Graug cannot be equipped with homing missiles,
therefore you'd be denied the special all-out missile attack and lock-on
missile attacks if you pick the Variable Graug.

As for plug-ins, you will definitely need shield, booster, missile
upgrades, these take up 5 slots in the VF-5000 and leaves you with only
1 slot, so choose between lock-on speed upgrade, terrain protection, or
mobility upgrade depending on your playing style.  Don't waste slots on
the Minmay song plug-ins for this Episode, since there are no Zentradi
opposition here.

As you start this mission, you are once again flying through a canyon.
Same rules from Episode 2-1 apply here.  Don't fly too high.  Avoid
collision.  X-X-A chaff and flare if the Warning! beep gets too scary,
and try to avoid the mines.

Here's what's new about this level: forked paths and beam gates.

Instead of a linear canyon like Episode 2-1, you will come upon forked
paths as you fly through the canyon here.  You will need to check them
out for yourself to see which side you want to fly through the next time
(trust me, you'll die plenty and get to practice here).  If you pick the
wrong path, you'll have to deal with a ton of mines, enough to make sure
you take the other path next time.

The beam gates are easy to deactivate, just lock-on to both sides, blow
out the beam activators and boom, the blue beam disappears.  You only
need to blow out the lowest row of beam in order to go under the other
beams in Gerwalk mode.  Once you get through the gate, change to Fighter
mode and try to make up for loss time.  Look out for homing missiles and
mines too.

Once again, your goal is to get to the end of the canyon, not to blow
everything up, so strategize accordingly.  The only thing you really
need to deal with here are beam gates, more specifically each gate's
lowest row of beam.

* Episode 4-2 – Destroy Disguised Turrets

Executive Summary:
Pilot/Valkyrie/plug-in are carried over from the last level.
Basic strategy: enter the hot zone in Fighter mode, lock-on to each
missile turrets (yellow triangles) and fire off 3 or 4 homing missiles
on them.  Change to Gerwalk mode after destroying all missile turrets
and deal with the Cannon Turrets (red-flagged Targets) by jumping around
while gunning them and avoiding firing from bugs hiding under the sand.

Detailed Guide:

I am not sure if this is one of the hidden levels that gets unlocked,
but it's a pain just like Episode 2-2.  Once again, you need to spend a
lot of time hopping around like a grasshopper in Gerwalk mode and keep
moving to avoid becoming a still target, and the booster upgrade
installed earlier now comes in very handy.

You start from a safe area.  Approach the enemy's camp in Fighter mode
and stay in Fighter mode while you fly around the center of the facility
and try to take out all the turrets that can fire homing missiles at
you.  Use missiles, lock-on and fire.

Once you've taken out all the homing missile turrets, transform to
Gerwalk mode and approach the Sphinx-like structures one by one.  They
are actually disguised turrets and fire huge shells at you in fixed
intervals.  Hop and jump while swinging left and right, just keep the
head of the Sphinx (the disguised turret) inside the big green circle so
you can pump more lead into it.  After one blows up, get to the next one
quickly.  I believe there were 5 total.  While working on the disguised
turrets, you may be shot by mobile bugs that seem to be firing at you
from under the sand.  You can choose to deal with them or not, just make
sure you are doing well with time.

* Episode 4-3 – Destroy the Mother Bug

Executive Summary:
Pilot/Valkyrie/plug-ins are carried over from 4-1 and 4-2.
Basic strategy: use the all-out missile attack special Action command as
much as you can, lock-on as many homing missiles as you can while the
Action Points replenish.  Repeat until you exterminate the big bug
(Target).

Detailed Guide:

You discover that those bugs that were firing at you while moving under
the sand were no accident.   Apparently, giant insects were bred for bio
weapon applications.  Well, one of them has gotten so huge and it sends
out little bugs like it was the SDF-1 sending out little Valkyries!
Your mission is to squash that ugly bug carrier and maintain mankind's
superiority over insects, of course.

I believe this is not a hidden/unlocked level, so you will get it even
if no matter what.  This boss level is fairly easy, just make sure you
don't allow the mother bug overwhelm you with its minions.  The mother
bug sends out a squad of new bugs at fixed intervals, so no matter how
good you are at taking them out, there's always more where that came
from.  Therefore, you should concentrate your attack on the mother bug
(red-flagged Target) and not waste your time with the little bugs.

For this episode, I recommend staying in Fighter mode and never
transform.  The little insects come at you fast, if you are in Battroid
or Gerwalk mode you will get gangbanged.  Fighter mode gives you the
speed and agility to outrun them.

Use your special all-out missile attack as soon as you get enough Action
Points.  You will need to do it a lot in order to destroy the mother bug
before time is called.  While the AP bar is being filled, charge the
giant bug and lock-on as many missiles as you possibly can.  Release the
missiles as they all lock-on and once you fly past the mother bug, hit
the booster to gain some distance before you do a 360 degree turn to
reacquire it in your sight for another round of locking-on.  Repeat
until you get 5 Action Points for another all-out missile special
attack.

The gunfire is useful against the little bugs that constantly spew forth
from the giant bug, but I really think it's a waste of time to knock
these good-for-nothings out.  Concentrate your firepower on the giant
bug and keep moving in Fighter mode, and you will clear this boss stage
without much trouble.

Episode 5-1 – Eliminate Enemy Ground Troops

Executive Summary:

Pilot: Max
Valkyrie: VF-5000 (or the unlocked Valkyrie with the most plug-in slots)
Plug-ins: missile upgrade, extra missiles, shield, lock-on speed
upgrade, mobility upgrade
Basic strategy: stay in Gerwalk mode for the entire level, use lock-on
missiles for every target and never stay still (keep hovering and moving
towards the current target).

Detailed Guide:

One of the good guy's facilities is under attack, it is surrounded by
ground units and an aerial bombardment fleet.  Your first mission is to
eliminate all enemy group troops surrounding the installation.

Due to the presence of Zentradi units, I recommend sending out Max.
Pick the available Valkyrie that has the most number of plug-in slots.
For this mission the VF-5000 is most likely the best one you can pick,
unless the game also unlocks the VF-14 for you for this Episode.  You'll
have either 6 of 5 plug-in slots available, and I'd recommend missile
upgrade (2 slots), extra missile (3 slots), and either a lock-on speed
upgrade (1 slot) mobility upgrade (1 slot) if you still have room.  You
can also substitute the missile upgrade or extra missiles with the
shield upgrade if you get shot down a lot in this and the next level.

You start near the base that you need to protect, and already homing
missiles are after you.  Change into Gerwalk mode and start hovering
towards the nearest target.  Your goal for this mission is to eliminate
all Destroids surrounding the base.  There is a bomber in the sky that
is constantly firing homing missiles at you, but you cannot hit it – if
you try to fly up and lock missiles on it, soon you will hit the
invisible ceiling and the game transform you to Battroid and drops you
to the ground, so don't bother with it.  If you keep moving in Gerwalk
mode, you can shake off enough of these homing missiles for you to clear
this level.

You can use either homing missiles or just fire your guns at the
Destroids – I usually go missiles all the way, although sometimes they
need a second round of missiles to finish off.  The good thing about
using missiles instead of gunpod is that you can start swinging sideways
after the missiles are fired, thus getting you out of the current
target's line of fire, if it is firing its gun at you.  If you decide to
go with guns blazing, make sure you hop with the booster occasionally
because some of the Destroids will fire back aggressively, taking away
valuable shield.  Also install gunpod upgrade instead of missile upgrade
if you decide to play this level with just guns.  Losing the missile
upgrade for next level is not a big deal, you just need to fire more
missiles there instead.

An alternative strategy is to stay in Fighter mode and pick the ground
targets off in the air.  I personally do not recommend it, because you
end up hitting the ground and taking collision damage a lot, not to
mention the forced Battroid transformation after you hit the ground
slows everything down.  You also get hit a lot by homing missiles fired
by that big ship in the sky when flying.  If you just want to try this
level in Fighter mode only, be sure to pack at least 1 terrain
protection plug-in during setup.

Episode 5-2 – Annihilate Enemy Bombardment Fleet

Executive Summary:

Pilot/Valkyrie/plug-ins are carried over from the previous mission.  You
are now skybound and must eliminate the two bombers before time runs
out.
Basic Strategy: use homing missiles on a bomber and keep firing missiles
until it blows up, then find the other bomber and repeat the missile
firing. Stay in Fighter mode for the entire mission.

Detailed Guide:

The enemy is not backing off even though you showed impressive courage
and skill in wiping out their massive ground troop all by yourself, and
the aerial bombardment fleet approaches without any sign of retreating.
You must destroy the two huge stealth bombers before they reach their
target.

I think this is a regular mission, not one of the hidden ones you have
to unlock.  It is also one of the easiest mission in the whole game.
You've earned it after biting and clawing your way through some of the
tough levels earlier.

You start this mission in the sky, sandwiched between two huge bombers
shaped like the Stealth Bomber.  Stay in Fighter mode for this entire
mission and do not transform, because the bombers' escorts will chew you
up if you transform to the slow-moving Gerwalk or Battroid modes.  By
staying in Fighter mode, you are fast enough to get out of their way and
makes it easy for you to acquire your Targets.

Pick either the one above you or the one below you, and start locking
missiles on it.  There is a vertical column of missiles on the left side
of the screen.  When you see them start to turn from green to black, it
means they are locked on and ready to fire.  Fire when you see the
entire column turns black, or if you prefer, fire whenever a couple of
them are locked onto the target.  The missiles on the column will
gradually turn back to green as each fired missile hits the target.
Keep your thumb on the A button and the refilled missiles will start to
lock on to your target immediately.  Keep pumping missiles into the
bomber and it will eventually blow up before your Valkyrie collides with
it.  Once you see the firework, do a 180 and head for the other bomber,
and start locking missiles on the last threat.

As you can clearly see, missile upgrade, extra missiles and lock-on
speed upgrades can make your work even easier for this mission.

Episode 6-1 – Destroy Enemy Squads

Executive Summary:

Pilot: Max
Valkyrie: VF-14 or the unlocked Valkyrie with most plug-in slots
Plug-ins: music (either 4 or 5 slot version will do, if available),
shield upgrade, missile upgrade, extra missiles, faster lock-on upgrade

Detailed Guide:

You are assigned to protect a satellite.  A Zentradi battleship warps
into the area, and you are charged with maintaining orbit superiority.
Once again, send out Max so we don't piss off Moa.  You should have the
VF-14 unlocked by now, so take that or the best Valkyrie you have
available out for a spin.  The VF-14 offers 7 slots, giving you a whole
lotta plug-in fun.

This Episode is basically dogfight in space, much like Episode 1 or
Episode 3-1 and 3-2.  You will face tough opposition, so let's start by
installing your Valkyrie with shield upgrade (if available) and missile
upgrade.  That's 4 slots right there.  You have 3 slots left, which is
perfect for the extra missiles plug-in.

If you have the music plug-in, let's give them Zentradi some
protoculture shock.  Install the one that costs 4 slots, and mix and
match the plug-ins to your liking for the remaining slots.  If you are
stuck here because you get blown up a lot, get the shield upgrade.  If
you run out of time a lot, install the missile upgrade and faster lock-
on upgrade, or extra missiles plug-in.  Don't waste your valuable slot
on terrain protection (pointless).  If you see the ECM plug-in unlocked,
you may wish to try it, but I haven't experienced any significant effect
with this plug-in myself.

The jut warped-in Zentradi ship will send out wave after wave of
opposition, take them out with gunpod fire or homing missiles as they
approach you.  It will eventually get to a point where different squads
come out at different areas so you are surrounded at the beginning of
each wave.  Use your special missile attack (X-Y-X-Y-A) at the beginning
of each incoming wave and gun down the remaining ones while you are
charging up your AP points to perform the special missile attack again.

If you feel that you are taking a lot of damage in Battroid or Gerwalk
mode here, switch to Fighter mode and fly around in circles while firing
your gun blindly, and perform the X-Y-X-Y-A special missile attack when
you have enough AP on the bar (5 segments).  This mission should be
fairly easy as long as you can remember not to engage in prolonged
dogfight with one or a few enemy units.  There are several waves to
contend with, and you don't have the time to go one-on-one with the last
unit in a wave, so special missile attack whenever you can.

Episode 6-2 – Destroy Enemy Squads

Executive Summary:

Pilot/Valkyrie/plug-ins are carried over from previous mission.
Basic strategy: special missile attacks all the way, and keep moving so
you don't become a sitting duck.  Fighter mode recommended.

Detailed Guide:

This is a hidden level that needs to be unlocked.  The Zentradi ship
basically hasn't given up and is sending out their two aces in what I
believe are Variable Graugs to gang up on you.  Looks like the word
honor does not exist in their dictionary.  Show them what you are made
of and send the Zentradis warping out with the tail between their legs.

This is basically a heavy duty version of Episode 2-3, you now have to
deal with 2 Variable Graugs instead of one.  The good news is they don't
have homing missiles, the bad news is they can sandwich you in their
attacks.

Not to fear, stay in Fighter mode so they cannot leverage their speed on
you.  Fly around in circles or try to lock onto them, but when you have
5 Action Points, let the missiles fly with the X-Y-X-Y-A command.
Repeat a few times and they will be toast.  Piece of cake again.

Episode 7-1 – Pass Through the Corridors

Executive Summary:

Pilot: Moa
Valkyrie: VFX-11 (the only possible choice)
Plug-ins: shield upgrade, gunpod upgrade, missile upgrade, extra
missiles, lock-on speed upgrade, booster upgrade
Basic strategy: stay in Gerwalk mode, only transform to Battroid mode if
you need to rotate on your axis/re-orient yourself and prepare for
locking missiles on a Destroid or turret that is hiding behind the next
corner.  Act as fast as you can, destroy all red-flagged targets.

Detailed Guide:

Since there are no Zentradi enemies in this Episode, let's pick Moa so
she can show her parents that she's become the ace of the Dancing Skull
squad in their absence.  The VFX-11 is the only Valkyrie you can choose,
so no headache there.  It has 7 plug-in slots, so let's upgrade its
shield and gunpod.  That leaves 3 empty slots, you can mix and match
from the following: missile upgrade, extra missiles, lock-on speed
upgrade, booster upgrade, mobility upgrade, and terrain protection if
you plan to transform to Fighter mode in the tight corridors (not
recommended at all).

You start in Battroid mode, so let's transform to Gerwalk mode for
speedy progress.  There's a Destroid waiting for you at almost every
corner, your radar/HUD will tell you the direction they will be
ambushing from.  Whenever you see a corner, turn so that when you hover
to the intersection, you will be facing down the corridor as you emerge.
This allows you to lock-on a bunch of missiles before you emerge,
release the missiles after you emerge, and hover back so enemy fire will
not hit you.  You cannot easily rotate in Gerwalk mode, so transform to
Battroid mode if you need to rotate on your axis and change back to
Gerwalk before you engage a Destroid or turret.

If you don't feel like using missiles, you can charge at the Destroids
or turrets while hopping around using the booster.  Just make sure you
do not take too much damage because there are several mines nicely
tucked away at hard-to-detect areas and you are bound to run in a few of
them.

Even though your primary goal is to go through the corridors and reach
the end before time runs out, you cannot accomplish this without
destroying all the red-flagged Targets.  They are shaped like the
antenna dish you dealt with in Episode 2-2, but here they serve as locks
on the doors.  When you come upon a locked door (usually colored
differently than the usual walls) you need to search for its lock nearby
and destroy it in order to open the door and proceed.  The missiles do
not lock onto the red Targets, that is why you need the gunpod upgrade
so you don't waste too much time trying to blow the locks up.

This level is a maze, and you simply need to play through it several
times to get a mental picture of where things are.  Be happy that it's a
2-dimensional maze and you do not need to go to higher or lower floors.
If you find yourself lost, simply try to reach the yellow or red targets
that are showing up on your radar/HUD and you will eventually find your
way out.

Time is your greatest enemy here, so move fast.  If you get lost and
find yourself revisiting places you have been to, then you will most
likely run out of time.  That is OK, it's the tuition you pay in order
to memorize the layout of the maze.

If you blow up too much then you might want to consider installing the
shield upgrade twice.  However, you should also re-evaluate your
fighting tactics – it is possible to take most Destroids and turrets out
without incurring much damage to your shield, which you need to save for
the mines.  Some mines can be avoided, while some can't if you are
pressed for time.  The mines are always at the same spots, so if you
suddenly lose a lot of shield, you know a mine has hit you.  Try to
remember the location and be extra careful when you approach the same
location next time.  Most mines are placed at corners or behind a door
so you don't even see it as you were approaching it.

Once you have destroyed the last red Target, proceed down the corridor
and turn the corner, and the mission is completed.

Episode 7-2 – Eliminate the Monsters

Executive Summary:

Pilot/Valkyrie/plug-ins are carried over from the previous mission.
Basic strategy: take advantage of the Gerwalk's ability, and use the
columns for cover.  Lock missiles on the Monsters, get out from behind
the column, fire missiles, then get back behind the column and repeat
until both Monsters are destroyed.  Avoid gunfire!

Detailed Guide:

This is a hidden level that gets unlocked.  Turns out there is a coup of
some sort, and the leader was kidnapped and now held hostage, guarded by
2 big and mean Monster Mk-IIs.

The kidnapped leader is located in the yellow-flagged target, guarded by
two Monster Mk-IIs (red-flagged as Targets) nearby.  You must not harm
the yellow unit, as the hostage will die if it is hit, a truly sticky
situation.

There are two columns placed roughly in front of each Monster.  Use them
for cover and stay in Gerwalk mode unless you need to re-orient yourself
and rotate.  Get behind the column, change to Battroid mode if you need
to rotate.  Change back to Gerwalk mode and start locking all your
missiles onto a Monster.  Hover out from behind the column, release all
the missiles and hover right back behind the column.  Keep doing this
until you destroy one of the Monsters, get behind the other column, and
do the same thing to the remaining Monster.

Be extra careful not to lock your missiles on the yellow target, or
accidentally let out a barrage of gunpod fire – the yellow target is
extremely fragile and its destruction means you have to restart the
mission.  When you get out from behind the column to fire your missiles,
try to keep the yellow target blocked by the column, so even if you lock
onto it by accident, the missiles would be blocked by the column.

Episode 8-1 – Destroy Enemy Fighter

Executive Summary:

Pilot: Max
Valkyrie: VFX-11
Plug-ins: shield upgrade, missile upgrade x 2, lock-on speed upgrade
Basic Strategy: use a mixture of X-Y-X-Y-A missile attacks, gunpod fire,
and homing missiles on your hapless victim and enjoy the calm before the
storm.  Try to gun it down as much as you can while keeping a few homing
missiles on its tail.

Detailed Guide:

A stray Zentradi fighter appears and you are charged with the mission of
getting rid of it.  Since the opposition is Zentradi, we don't want to
upset Moa by sending her or Millia for the job, so Max has to step up to
the plate.

The VFX-11 is the best Valkyrie available, so let's use it again.  Don't
let the painful memory of Episode 7-1 discourage you from using this
powerful Valkyrie.  It has 7 plug-in slots, and that's the most you can
get in Story Mode.  Since this Episode takes place in the air, we can
cross out terrain protection from our list of plug-in candidates.

I think shield and missile upgrades are most useful here.  Secondary
plug-ins for you to consider include gunpod upgrade, extra missiles,
lock-on speed upgrade, lock-on range upgrade, and mobility.  If the
music from Episode 8-2 gets on your nerve then get a music plug-in at
the expense of a less shielded or offensive Valkyrie.  I found the best
combination to be a double installation of missile upgrade, a shield
upgrade, and a lock-on speed upgrade, as you will be relying on missiles
a lot for Episode 8.

The lone Zentradi fighter is not much of a threat, it will fire off some
homing missiles on you, but that's about it.  All you need to do is to
destroy it before time runs out.  If you find yourself chasing it around
in a circle, use the X-Y-X-Y-A missile attack to break yourself out of
the routine and see if that helps you get it in your line of sight for
some gunning or missile lock-ons.  The Zentradi fighter is pretty fast
and can often outrun missiles, so you will need to rely on your special
missile attack (X-Y-X-Y-A) and gunpod firing more than homing missiles
(it's always good to have a few homing missiles on its tail to keep it
occupied though).  Try to nail it with gunfire as much as you can.

Episode 8-2a – Eliminate the Opposition's Ultimate Weapon

Executive Summary:
Pilot/Valkyrie/plug-ins are carried over from previous mission.
Basic Strategy: stay in Battroid mode, lock as many missiles as you can
and dodge the projectiles by twisting left and right as you try to lock
more missiles on the enemy.  Fire whenever you get 2 or 3 lock-ons and
repeat.

Detailed Guide:

The "bad ending" is almost guaranteed if you get this instead of Episode
8-2b.  You might as well finish this level, since it will prepare you
when you eventually get to play Episode 8-2b.  I had to win this one 3
times before Episode 8-2b got unlocked.

Two Zentradi fighters arrive to back up the lone fighter you were
beating up on.  They combine into some kind of flying freak and start
firing huge cannonballs at you.  You must destroy this Ultimate Weapon
before time runs out.

The Ultimate Weapon alternates between jamming your signals (and your
ability to lock-on to it) and firing a barrage of large shells at you.
Even though they do not home-in on you like missiles, their sheer size
combined with good aim make them deadly.

Stay in Battroid mode for this mission and try to lock on as many homing
missiles as you can on the sucker.  Keep in mind that it jams your
signals so by the window of opportunity to lock missiles on it is
extremely narrow.  You rarely get a chance to lock all your missiles on
it, so don't even try.  As soon as you get 2 or 3 missiles locked on,
let them fly and hold down the A button immediately and try to score
more lock-ons.  While trying to get a lock-on, twist your Battroid
around to dodge the projectiles.  This twisting around will also reveal
projectiles that would otherwise be blocked from view so you can get out
of their way.

You do not need to use special missile attacks at all for this mission,
just try to lock-on as many missiles as you can without taking too much
damage from its projectiles and you can defeat it before time is up.

Episode 8-2b – Eliminate the Opposition's Ultimate Weapon

Executive Summary:
Pilot/Valkyrie/plug-ins are carried over from Episode 8-1.
Basic strategy: stay in Battroid mode, lock all your missiles on the
target, fire, and repeat.  When target gets close it will use its beam
blade on you.  To prevent this from happening, try to let some homing
missiles fly or perform the special missile attack command (X-Y-X-Y-A)
so it will try to evade the missiles instead of trying to attack you.

Detailed Guide:

I got the good ending when I unlocked this level and got to play it
instead of the usual 8-2a.  The new combined Ultimate Weapon is humanoid
and does not resemble the one from 8-2a.  The bad news is it has both
the giant cannonball projectile AND a melee weapon in the form of a
gigantic beam blade, which inflicts major damage on your shield.

Try the same strategy as you would in 8-2a, but instead of firing as
soon as you get a few missiles to lock-on, try to lock all your missiles
on the bastard before firing.  The X-Y-X-Y-A special missile attack will
also be useful here if it gets too close and refuses to back off.  If
things get really hairy with it in your face, transform to Fighter mode
to gain some distance before you return to Battroid mode and resume
locking missiles on it and firing.

If you get destroyed a lot in this level, consider a double shield
upgrade instead of double missile upgrade.  The double missile upgrade
worked for me, even though by the time I cleared the mission, the shield
was dangerously low.

* The Ending

How do you know if you got the good or bad ending?  Easy to tell.  If
you got the bad ending, Moa throws a tantrum and you see a black screen
with words to the effect of "Try to Make Moa Happy, Try Again".  If you
got the good ending, the credits will roll while the ending song plays.
Enjoy!

* How Do I Get the Good Ending?

Unfortunately, no one knows for sure yet.  Many have earned the good
ending, but no one has yet offered any solid proof for their theory.
For what it's worth, I speculate that you want to avoid using Millia and
Moa in Episodes that contained Zentradi opposition, unless it's an
Episode prior to Moa's appearance.  Additionally, you must unlock all
levels.  If you find out a surefire way to get the good ending every
time, be sure to share it on the Macross M3 board over at
http://www.gamefaqs.com

* How Do I Get the YF-19 and YF-21 from Macross Plus?

Since they are unavailable in Story Mode, I consider it outside the
scope of this Episode Guide (which is not a full-blown FAQ, by the way).
You can find the answer to this question on the Macross M3 board at
http://www.gamefaqs.com

* Totally Unrelated Stuff I Just Felt Like Including

The Limited Edition copies of Macross M3 came in a DVD-sized box made of
cardboard paper has features an original illustration of the game's main
characters on the box cover.  However, the only item you get inside,
besides the game itself, is a laminated card.  The card depicts one of
the 3 main characters – Max, Millia, and Moa.  Unfortunately, you don't
know which card you will get until you break it out of the box.  If
anyone has a Millia card and wants to trade it for the Max card I have,
feel free to e-mail me at [email protected]

There is a sweepstakes number printed on each card, unfortunately the
contest is only open to residents of Japan, so even if you have the
grand prize winning number, it's still worthless outside of Japan.

You can see what these 3 cards look like by going to the game's official
site at http://www.shoeisha.co.jp/enter/m3/, scroll down the main
page and click on the animated banner at the bottom.  After the new page
loads, you will also see the three cards on the top.  Scroll the page
down and you will see the prizes offered to lucky winners:

# of winners    Prize
1               Painted and Assembled VF-1S Skull Leader in Fighter mode
50              Fully transformable diecast VF-11B toy by Yamato
50              Hasegawa VF-1A in Fighter mode plastic model kit
50              Hasegawa VF-1J in Fighter mode plastic model kit
50              Hasegawa VF-1S in Fighter mode plastic model kit
100             Macross M3 Sound File original soundtrack CD

While you are at the game's official site, click on the link that says
GAME SYSTEM and check out a wicked screen shot showing a bunch of
missiles coming out from what looks like the good old Glaug pod.
Apparently it was a shot taken from the game while it was still in
development, too bad it wasn't included in the final released of the
game.


