Strategy Guide - Guide for RPG Maker
- Cheats |
- Unlockables |
- Hints |
- Easter Eggs |
- Glitches |
- Guides
Scroll down to read our guide named "Strategy Guide" for RPG Maker on PlayStation (PSX), or click the above links for more cheats.
ooooooooo. ooooooooo. .oooooo.
`888 `Y88. `888 `Y88. d8P' `Y8b
888 .d88' 888 .d88' 888
888ooo88P' 888ooo88P' 888
888`88b. 888 888 ooooo
888 `88b. 888 `88. .88'
o888o o888o o888o `Y8bood8P'
ooo ooooo oooo
`88. .888' `888
888b d'888 .oooo. 888 oooo .ooooo. oooo d8b
8 Y88. .P 888 `P )88b 888 .8P' d88' `88b `888""8P
8 `888' 888 .oP"888 888888. 888ooo888 888
8 Y 888 d8( 888 888 `88b. 888 .o 888
o8o o888o `Y888""8o o888o o888o `Y8bod8P' d888b
RPG Maker FAQ
BY: Dyson Turner
E-Mail: [email protected]
Ver. 1.6
Date :October 15,2000
Table of Contents
I. Revision History
II. Introduction
III. Game Controls
IV: Gobli Walkthrough
V: Making an RPG Walkthrough
A. System Data
1. Title Edit
2. Configuration
3. Gameplay Edit
4. Parameter Name
5. Magic
6. Item
7. Main Characters
8. Skill
9. Monster
10. Dungeon
11. Field.
12. Monster Appearance
13. Game Info
B. Scenario Data
1. Create Event
2. Treasure Event
3. Duplicate Event
4. Intro Event
5. Display Message
6. Move Location
7. Take Over
8. 2 Way Choice
9. 3 Way Choice
10. Switching
11. Change Screen
12. Inventory
13. Wait
14. Event Status
15. Party Display
16. Party Members
17. Move Party
18. Party Status
19. Character Status
20. BGM
21. Sound Effect
22. Shop
23. Battle
24. Game System
25. Effect
26. Display Title
27. Ending
28. Prohibit Escape
29. Save Point
30. Next Scenario
31. Exit Screen
VI: Anime Maker Walkthrough
VII: Entire Game FAQ *Updated *
VIII: Thanks
IX: Copyright
++++++++++++++++++++++++++++++++++++++++++++++++++++++++++++++++++++++++
Revision History
10/15 Retuled some of the sections in Scenario Data
10/7 I figured out Questions that plagued mankind since this game was created
check Question 2-4 in the FAQ!
10/2 I got some new good beginner questions in the FAQ
9/29 Thanks to the trillion e-mails about Switching I decided to do a full
explanation plus pump questions in the FAQ.
9/27: Thanks to ([email protected]) for informing me of the Attack
+1 skill that I goofed on! Also there are new questions in the FAQ, some basic
questions about the game from people who have not played or seen it yet.
9/26: I got the same question from many people it is answered, look it is the
first question in the FAQ Section!
9/25 Still the same day I decided to do more work on it completed the Gobli
Walkthrough, complete both Scenario Data Anime, and System. This thing is
complete needs questions for FAQ
9/25 Created FAQ, realized I did much work will try to get it submitted...
++++++++++++++++++++++++++++++++++++++++++++++++++++++++++++++++++++++++
II. Introduction
RPG Maker is one of the newest and most innovative games in Playstation
History. It is exactly what it sounds like it a game that allows you to
make a RPG. People like my self drooled over this thing for month, the
controls and things take some time and patients but within days I'll
help you avoid common pitfalls and problems many people had with this
game.
++++++++++++++++++++++++++++++++++++++++++++++++++++++++++++++++++++++++
III. Game Controls
Directional Buttons:
Menus: Moves the cursor around and increases/decreases values
L1/L2
L1 and L2 are used in Field Edit to automatically select map sections. With Auto
Fix on it is used to switch between letters
R1/R2
These are used to erase map parts in field edit. It also performs the
same text features as L1/L2
Start/Select
On Field Editing, the Start button Brings up the map screen. Select is
never used.
X Button:
This is used to confirm things. The same goes for in the game.
O Button:
This is the cancel Button.
Triangle Button:
This brings up the commands, in map and field editor.
Square Button:
This allows you to edit or delete Event Contents in the event screen.
+++++++++++++++++++++++++++++++++++++++++++++++++++++++++++++++++++++++++++++
IV: Gobli Walkthrough
When the game starts off you will be able to do nothing. Look at the story you
will see Gobli is just an ordinary Goblin that is easily defeated in any
standard RPG. Gobli will go back to weakling town the Creator will call him. The
Creator will tell Gobli to go to Common Plain, to help out the Slimes there. He
needs to speak to Slimey the Head Slime. Now go around town the only things of
importance right now are a few healing items snag those. Exit out of the bottom
of the town. You will be on the Map screen chose to go to the tower. Now go up
the stairs until your reach a fairy then exit, the tower.
You will be in a forest a few fellow weaklings will be there fight those, and
cure when necessary because this is similar to games like Dragon Warrior where
you can't run unless you are stronger than the enemy you are not stronger at
this point. You will also need to gain experience I advise you to do so here. At
least get to level 3. When you first get their go down. Then tale the path going
right then down again. You will be in Common Town, speak to the guy by the sign
to here his woes. Stay at the inn if needed and stock up on curative items. See
that shack near the bottom of the screen. Go in there a monkey will be there he
will jump through the whole in the wall. That's not an ordinary hole that's a
wall hole with problems. He doesn't want to be a wall hole any more; he wants to
find out how he can have a range of motion. He will also guide you to Common
Plain. He starts off on level 1 I think and he has a curative spell.
When you are done with common town the exit is through the bottom. On the map
screen go to Common Plain. You won't be there yet by the way the wall hole's
name is Mark. Mark will tell you the Common Plain is further to the north. So
that's where you have to go fight enemies along the way keep going up until you
hit a Bridge then cross it. You level here should at least be 4-7. Anywhere in
there you have a chance and that is for both characters. Keep going up its a far
way away. You will run into the slimes. The Slimes will be arguing over there
range of movement. To stay on the Common Plain you will have to fight them. The
slimes aren't tough they have about 10 hp each but high defenses if you aren't
strong hopefully Mark will have high enough levels to stop the attack. Mark is
also your main curative if you are low on items and HP. When you ice them off
the slimes will tell you about how not to come at heroes all at once. Mark will
want to know that more about range of movement he will send you to see an old
Castle Guard since they don't move. Which is your next destination.
Now leave back out and go to the map screen you will see Soldier's Home. When
you get there you may have to do a bit of traveling also save on the world map
this game is lacking save points. When you finally work your way to Soldier's
Home, the Soldier will basically tell you to buzz off. He is too proud to answer
your questions and he will tell you to ask a working castle guard. So leave here
and when you get back on the map the road to the castle should be there.
The castle is large and complex but it doesn't have too many levels, but you can
gain at least a good two levels battling through it, don't go for many treasures
because that will slow you down and you will encounter more random enemies. The
idea is make your way to the top of the castle. You will see a cut scene where
the heroes will have to fight the guards. Then it will switch to your current
party. Then approach the guards there are no random battles on this floor. Next
step go to the guards the guards will ask if you are heroes or not. They have to
fight you. The guards are pretty tough but the guards can go down. When you are
done with the guards they will tell you why they take pride in their work.
Because they understand their role as just castle guards and that is all they
want to be. They know about having to fight everybody who comes across them.
They don't wish to have a motion. The screen shifts, and Mark and Gobli are
discussing how things seem to be failing. All of a sudden a cat thinks what they
are talking about is boring.
The cat name is Neko, Neko also wants to become a boss just like Gobli. He has
heard of a castle where all the bosses live. It's called Boss Castle, and its in
the underworld. You will be automatically brought back to the map screen. Head
to Common Town then to the forest. Then work your way back down the tower until
you reach the Under World. When you get there you should see a New Castle. Enter
the castle, when you do the Head Boss will tell you how weakling need to stay in
their place, and there is now way a weakling can become a boss. This makes Neko
furious plus the other bosses laugh Neko Mark and Gobli out of the castle. You
will be automatically returned to common plain. Things again look hopeless for
the trio. Slimer approaches them and tells them about another weakling who
became a boss. He is a hermit who lives in the middle of the desert. You will be
automatically on the world map so I advise you to save the game here. When you
get into the desert things won't be easy it relies on probability, more than
likely you will walk around aimlessly for 5-10 minutes and hopefully you will
come upon a stone structure if you do climb the stairs and go to the sparking
thing.
When you get there you will be on top of a tree go across the branch then down
the stairs into the little hut. He is old so he forgot about being a Boss. He
then remembers and he tells you to go and see Evil Lord Garmos in Zomar. He has
the Boss Emblem with the Boss Emblem you can become a Final Boss! Remember what
the old man says every character in the RPG is important minor or major,
Weaklings are important too. Well anyway leave out of the house and you will be
back in the desert simply exit it since you will be back at the entrance. Now go
to Zarmos, you will be in a more complicated forest than the first one, but its
not too complicated. Head right twice then make a left and you will arrive at a
cathedral. Evil Lord Garmos will be practicing for when the heroes come, he will
realize you are not heroes. Neko will want to fight for the Boss Emblem. This
guy is tough he can deliver some nasty spells, but with all the random battles
you should have your levels into the mid teens possibly the early 20's and Mark
should have some wicked spells. So shellac this guy, when he is defeated you
will have the boss emblem. The phone will ring and it’s the "creator" He will
realize you defeated Garmos, at first he will think the game will have no
ending. Then he figures since you are strong enough to defeat Garmos you deserve
to be the Final Boss.
Now head to the Final Boss Room. You will be brought back to the map
automatically, I advise you to save here there are some very tough enemies
inside here. Now once you enter here go to the south. Then on the next screen go
to the south but when you see the south exit go to the exit right of that. You
will be in a screen with water on it, behind one of the waterfalls you should
see a cave in there is the games only Save Point. Use it, and exit, to the
right. You will here murmuring under the water, Neko gets bold and asks whoever
wants the boss emblem to come and take it. All the Weaklings come out at once,
the Weaklings are tough and this is a long drawn out battle because the
weaklings will heal them selves a lot. But just relentless spells and some good
physical attacking if you got some good weaponry can take down, the weaklings.
After you defeat the weakling head right, then you head north. You should see a
fork not to worry take the right path. When you exit go right again, and you
should be in the Final Boss room. You will hear the "Creator" voice yet again he
will explain to you about things and how there can't be 2 Final boss's Mark
doesn't want to be a final boss, his quest is basically done. So you and Neko
must fight to become the Final Boss. Neko is pretty tough he has some great
moves and somehow he can now cast curative spells, he has a few good attacks,
but nothing deadly. Take Neko out, and finally Gobli will talk because the
"Creator" claims him to be the last boss. The Screen will fade and you will see
the beginning of the game, it seems Gobli didn't become the Final Boss he
realized that being a weakling is good enough for him. Mark went to Common Plain
and was arguing over movement range with the Slimes. And Neko became the Final
Boss.
~Fin~
+++++++++++++++++++++++++++++++++++++++++++++++++++++++++++++++++++++++++++++
V: Making A RPG Walkthrough
Making a RPG Harder than you though? Well, I'll explain every option to you in
layman terms ok?!
A. System Data.
System Data is the first steps the groundwork and the look of your RPG's. If
you're new to RPG Maker do your work here. Don't go to Scenario Data first even
if you are an expert trying to find new tips, you got to have your tangibles in
order. First thing is First, and that's:
1. Title Edit
Screen:
You get these choices
None-Plain ol' Black Screen
Book- A Brown book with writing on it
Sunset: A town in the sunset (My favorite)
Space: Stars pretty cool
Stars: A Dizzying vintage Outer Limits Screen
Sky: blue Sky big clouds
Country: Some pigs in a forest with tombstones.
Magic Symbol: A Big Star like symbol on the ground.
Bricks: A Brick Wall
Hearts: Yellow background with hearts on it.
BGM:
You get a huge list of music to chose from tryum all!
Text:
Do you want The title to be displayed on the title screen?
Color:
If you chose Text you can choose between blue, gold, and Silver.
Place:
Low on the screen Middle or High?
Effect:
How do you want it?
None-Title stays in the place you put it.
Fade in: Title fades in moderately quick.
Fade From Top: Title Slowly makes it way down to the position you put it.
Top. Title comes down from the top with no Fade.
Right: Title comes from the right of your screen.
Left & Right: The very cool effect where the title looks eligible at first they
cross and you can see it.
Background: Title Comes from the background in to the spot you put it.
Foreground: Title comes from the Foreground to the place you set it.
=============================================================================
2. CONFIGURAION
Cursor Speed: Determine How fast the cursor will move. Using 1, will make it
move real fast.
BGM: Select the Background music to be played while making the game. I recommend
none although this game has some good tunes it gets you more frustrated with the
music on.
Sound: Stereo or Mono
Collision Sound: Set the sound that will hear when you bump into something.
Message Sound: Set the sound you will hear when you look at a new page of
messages.
Level Up Sound: Set the sound you will hear when your characters gain levels.
=====================================================================
3. GAMEPLAY EDIT
Special Attacks: Will your characters or enemies use special moves? Toggles on
and off special moves use HP.
Use of Class: Will you characters items or monster use classes? Class gives
different effects that you set for items weapons and magic.
M Def: Will you or your enemies be able to block certain magic spells?
Abilities: Will your characters use born with abilities?
Monster Appearance: Manual or Auto. You could either have monsters randomly
placed in the dungeon. Or set where exactly will the monsters be.
============================================================================
4. PARAMETER NAME
Change the name of the abbreviations for the following. Here are their defaults:
STR= Strength
DEF= Defense
STA= Stamina
INT= Intelligence
AGI= Agility
Luck
Level
Magic
S ATK= Special attack
Item
HP= Hit points
MP= Mind(Magic) points
Attack
Guard
Gold
EXP= Experience
M DEF= Magic Defense
Magic A= A Magic
Magic B= B Magic
Magic C= C Magic
None= No Magic
=============================================================================
5 MAGIC
Edit: Lets you create new or edit existing data
Move: Change the order of which they were created
Copy: Duplicate something and place it in another slot.
Delete: Delete one item from the data
Delete All Delete All Items
Name: Edit the name of the magic spell
Type: If Special attacks or on you can change it from Magic to S Attack.
Effect: Here is a list of effects that magic can cause:
None OTH
Inflict Damage ATT Death SPE
Recover HP CUR Increase Attack AID
Cure Poison CUR Increase Guard AID
Cure Silence CUR Increase AGI AID
Cure Confuse CUR Steal MP AID
Cure Sleep CUR Reflect Magic AID
Cure Paralysis CUR 100% RES Mag AID
Cure Petrify CUR 50% Res Mag AID
Cure Curse CUR Enemies HP AID
Revive CUR Dispel AID
Restore Status CUR Teleport OTH
Decrease Attack AID Escape Dungeon OTH
Decrease Guard AID Encounter Down OTH
Decrease Agility AID Check Item OTH
Poison SPE
Silence SPE
Confuse SPE
Sleep SPE
Paralysis SPE
Petrify SPE
Use of MP/HP: How many MP/HP's will the spell use?
Points: How much damage will it do 1-9999
Magic class: If you are using magic classes select which one here.
Range: Single Group or All?
Graphics: Select the spell graphics, if you are not sure what to do here, or you
can't figure out how to make a good spell cut a corner and use a sample. You can
have the spell use 3 different effects listed as Action1-3. You have different
sets to chose from.
Message: You have 20 different messages to chose from, like ignite awaken etc.
=============================================================================
6. ITEM:
Name: Name the Item
Type: Give this item a Type here is a list of types:
Other: An event item of sorts
Weapon: An Item that is normally used in battle
Drop: Can you drop this weapon?
Graphic: Chose the graphic for this weapon when used in battle
Class: Select the weapon class like Magic class.
Magic: Have your weapon unleash mysteriously powerful magic!
Who: Can everybody get this weapon? Or is this a weapon with awesome abilities
no one can have? You decided.
Attack: How much damage will this weapon deal? Be a nut and choose 9999.
ATK #: Can you use this bad boy more than once?
Range: Can it destroy every enemy on screen, just one group, or just one enemy?
Armor: An item worn on the chest to decrease damage from physical attacks.
Shield: An item held by hand to decrease damage from physical attacks.
Helmet: An item worn on the head to decrease damage from physical attacks.
Magic: Do you have a magical hat, how about a shield that shoots rock (quit
laughing)
Who: Who gets to use this defensive item?
Guard: set it from 1-9999 its like attack except it ups your defense.
Accessory: An item that improves your base stats The stats it can improve are:
Attack, Guard, AGI, Luck, M DEF,
Magic: An item that has the same ability as a magical spell.
Cure: An Item that can restore HP/MP or your status.
Transport: A Mobile Item Blimp or Boat.
Key: Open doors that you set as locked.
Food: Food Can add a certain amount of strength to: Strength, Defense,
Stamina, Intelligence, Agility, Luck, Magic Defense, Experience. You can set a
value to this.
=============================================================================
7. Main Characters
Name: Give it a name
Skill: Give it a skill (Skill Creation is in the next section)
STR, Def, Sta, Int, Agi, Luck, M Def(If set). Set the amount you will get at
each level up, please don't jump out the window with unbelievably high starting
stats.
Equip: Set the starting equipment that you created earlier.
Level: Set your character starting level
Magic Level: Set the levels it will learn magic on if you want it to know all
the spells you created set it on level 1.
Graphics: Give this character a look.
Color: Change the color palette.
=============================================================================
8. Skills
Name: Name the skill Duh!
Ability of the skills: Here is a list of possible abilities your character can
have, plus an explanation.
None: He does nothing
First attack: Always get the first Attack
Treasure Find UP: Increases the chances of enemies dropping goodies.
1/2 Mp Cast: Character uses half the mp that you set for the spell.
2X Magic: Character spells hit double the amount you set them to.
Critical Hit Up: Characters chances of critically hitting an enemy chances are
raised by a percentage
Battle Heal: Your character will be randomly healed during the battle.
Counter Attack: Enemy hits you, you hit it right back ignoring all standard RPG
rules of waiting.
Attack +1:Not one lame point, how about an extra attack! I tried this, it was
cool, you attack twice!
Reflect Attack: Block the attack, and make the enemy hit it self with it.
HP Drain: During the battle the character will drain the enemies HP
EXP Up: Gives ya more EXP after the battle.
No Class: When that character is hit with magic the magic class setting will
have no effect.
Random Ability: Sometimes bad most of the time good, your character can do
basically whatever it wants, from any of the abilities.
AI: Your character is smarter than the aveERage Bear!
Resist Magic: Your character is basically immune to magic.
Skill can also increase your abilities, don't have it increase it by much unless
you want to.
Condition- You can set the condition of which the character gains this ability
like getting a certain level reaching a certain strength etc.
=============================================================================
9. MONSTER
Name: Name this evil exp and gold giver!
Edit attack/Treasure
Edit its attacks and what it will give you after battle Etc.
Here are the abilities you can give it:
No Critical Hits: None of that highly annoying ill timed 20 HP left strong
blows.
Critical Hit UP: A strong monster usually who can deal out more damage with the
critical attacks
Double Attack: For the faster monster who can sneak in an extra blow before you
recover your wits.
Multi Attack: For the ultra fast who can get in 3 hits before you can get a lick
at it.
Miss Half attacks: For the big but slow enemy, who just can get things to work.
2X Damage: For the enemy who maybe powerful but doesn't look as powerful as he
should be.
Auto Battle: Equal attacks instead of 90% do nothing 10% normal attack, you big
cheater!
Attacks: Set the attacks you want your monster to use:
Normal: these are your extraordinary standard issue attacks that most monsters
will use and the nominees are:
Normal Attack: Attack normally
Charging Attack: He's pissed and he's coming strait at you, does nice damage but
you get to pop him in the back of the dome for running at you like a nut.
Poison Attack: Hey does he have Lima Beans under his claws cause I feel sick
Paralyze: He scared me by showing me a picture of his mama! I can't move!
Sleep Attack: He attacks you fall asleep is that even possible?
Petrify Attacked: Your stoned, but like always you can recover.
Critical Hit: Kills, or almost kills the enemy.
Action: These are more advanced than the normal attacks.
Do Nothing: He actual stands there and doesn't do anything.
Guard: He guards until its next turn, it halves your damage.
Flee: The enemy puts on its skirt and runs like a schoolgirl.
Self Destruct: Kamikaze style, the enemy waits to its energy dropped to half way
point and blows up on you inflicting critical hit damage.
Steal MP: The monster will steal your MP
Hide: The enemy will disappear
Magic: Enemy uses a magic spell
S ATK: The enemy uses a special attack on you.
Class: Give your monster a magic class.
Treasure: What item will it give you after the battle and the probability
Graphics: 99 pre made pictures to choose from select the one you like the best.
you could adjust the color and reverse it too.
=============================================================================
10. DUNGEON
Sample- You have sample Dungeon pieces to chose from plenty of them
Dungeon 1, Forest, Desert, Sci-Fi, Magic, Pyramid, Dungeon 2, Church, Bridge,
Tower , Castle, Tower 2, Arena, Igloo, Shop, Mansion, Ruins, Tomb, Other
Custom: Inside or outside.
Part 1: contains parts you can only use once, like wall pieces, and house fronts
etc.
Parts 2: Contains spread pieces like Grass, and dirt, and walls.
Cut: Cut out an unwanted piece
Copy: Duplicate a piece
Paste: Place a piece that has been recently cut or copied
Name: Name this crazy place
BGM: Give it some more life by adding a tune
BG: Use tile or Wallpaper, Tile Preferred for dungeons
Mode: Auto Fix on/off
=============================================================================
11. FIELD
*Press Triangle to edit the following*
Parts: Change & manipulate the parts on the map.
Cut: Cut parts out of the map
Copy: Copy a part from the map
Paste: Place a previously cut piece from the map.
Name: Name the Land
BGM: Set the music that will play on the map
Tile: A or B, you chose
Town: Place a Town on the map
Graphics: Made a dungeon or a tower or a town? Chose the graphic that fits it
Appear will this place always appear or will it be switched on? (Switch
explanation in the next section)
Destination: Where will it take you when you enter the town?
Location: Set the location of the dungeon where you will enter.
Method: Black, Black Melt, White, White Melt
=============================================================================
12. Monster Appearance
Select Monster: Select the monster(s) who will appear in the area.
Probability: 0-5 0 is the lowest.
BGM: Select the Background Music that will blares while fighting the monsters.
Battle Test: See if you can takum!
=============================================================================
13. Game Info
Title Name: Finally enter a name for your Master Piece!
System Name: put the name that you gave the scenario data here
Staff Name: Give the name of the people who created your masterpiece
Set Password: Don't want lil' Jimmy destroying your masterpiece? Well set a
password using the controller to keep the little bugger away.
Delete Data: Wasted 10 hours on complete garbage get rid of it at once and start
a new!
+++++++++++++++++++++++++++++++++++++++++++++++++++++++++++++++++++++++++++++
B. Scenario Data:
Now we get interesting here is the Scenario Data where you put stuff in, to
actually make the game!
I advise you to figure out and brainstorm ideas before randomly inserting things
in here, it may sound boring but if you have an idea of what will happen it will
make production time shorter. This is also the frustrating part you'll see...
=============================================================================
1. Create Event
The most basic of all set the spot you will create your event, a whole list of
options will come up. But I will discuss the first screen first!
Graphic: Put a character or object here
Color: Adjust the color of the character/object
Face: Which way will the character face?
Ghost: will it be faint?
No Graphic: Erase any graphic here.
Move Type:
Don't Move: This is usually preserve for objects or important characters.
Random: Have the character do whatever it want whenever it wants however it
wants.
<- -> Moves right and left only (shop owners)
Up down: same as above
Close Up: The event will be drawn to you.
Awa: The event will run away from you.
Step only: The event will walk in place.
Flashing: Stop that giggling, it won't flash you, but it will flash.
Start: Pick the direction where it starts, also you can make it so IT DOESN'T
START. This is usually accompanied with events that you don't want to happen
again.
Activate Event Method: Touch, Check, Key or Item.
Page Conditions when using an event that will do two or more things you will
need something to trigger it. You could use items, cash, switching, or others!
=============================================================================
2. Treasure Event
Like the above only difference is it has a graphics before an after the event.
For example, a treasure chest.
=============================================================================
3. Intro Event:
Like the above two the difference is this event will start as soon as you enter
the dungeon.
Intro events are used in conjunction with the Take Over Command. This is if you
want an event to happen automatically as soon as you get on the page no matter
what!
=============================================================================
4. Duplicate Event:
Use an event that is already on the page more than once. You can also have the
event move at the same time using this like to give an effect of guards moving
in a pattern etc.
=============================================================================
5. Display Message:
A Very basic event where a message is displayed, you will use this a whooooooole
lot. You have choices:
Normal: The text window is that on the bottom of the screen for standard
conversation, you can use as many pages as you want here.
Main Character: A Comic book type balloon appears over the main character you
can type in a short message of 11 spaces, usually when they have a small
thought.
Event: Like the above but it appears over the event like a sign.
Message 1: Story telling text the message starts from the bottom and works it
way up.
Message 2: The message is against a black background usually used for a far away
voice, or narrative text.
=============================================================================
6. Move Location
This is used for when you want to go to a different dungeon through a doorway,
or to be teleported. You select where exactly in the next dungeon you want to
go. Then like the Field edits you select black, white, black melt, or white
melt.
Also you have to set the coordinates before doing this so you won't end up on a
plain black screen. Press X next to the numbers under the location for this to
work.
=============================================================================
7. Take Over
People don't understand this one, this is where you can start another event from
where you are at, it's like an intro event because of the automatic activation.
You select the page you want to start on and select the event. A good idea is to
have the character move to the event, or at least near it if its a visible
event.
So for example:
You want Jack to walk over to Jason AUTOMATICALLY, then you want him to start
talking. A Take Over can be used here.
Event 1:
Display Message: Normal: Hey Jason, what do you have there?
Event Status: Move Event: Up 5
Take Over Event 2 page 1
Event 2:
Display Message: Normal: Nothing man
Now Jack will walk over to Jason and he will start speaking.
=============================================================================
8. 2 Way Choice
This is where you get 2 choices, usually used for save points or in shops
sometimes if someone is asking you a question. You get a menu:
Yes/No- You give a yes or no answer to the question.
Messages: instead of yes or no you give a message
Probability: Instead of a choice the game selects the probability of something
happening like for instance stepping on a switch and you give it a 1%
probability of giving you 10,000 gold.
Win/Loss usually used with a battle you can change what will happen after the
battle if you won or you loss. (Used for arenas if you want a Legend of Dragoon
or, Star Ocean 2 type thing)
Let's say you select Yes/No on the event page it will look like this:
Display Message:
Yes/No
Choice 2
Now you insert the "Yes" message or event here
Display Message:
Yes/No
YES ANSWER HERE
Choice 2
NOTHING, OR NO ANSWER HERE.
=============================================================================
9. 3 Way choice
Like 2 way choice but you're adding a 3rd choice to it.
=============================================================================
10 Switching
Here, I will make a Final Stab at trying my freakin' hardest to make people out
there understanding switching.
SWITCHING may sound difficult but it is rather easy. First off you have to
understand PAGE CONDITIONS FIRST, and adding a page before you can fully utilize
switching to its maximum effect.
Step 1: Add a page:
!!!!!!!PEOPLE PRESS TRIANGLE!!!!!
Just that one button with the Triangle figure, on it you do know what a Triangle
is?
PAGE CONDITIONS
AFTER YOU ADDED A PAGE WITH TRIANGLE! Scroll down to the bottom of the page that
says PAGE CONDITIONS. IT SHOULD BE WHITE WRITING IT SHOULD SAY PAGE CONDITION!
There should be 6 blank lines underneath it. Click on one (NOTE THIS ONLY WORKS
ON PAGE 2) Now you should get more options and the first one is SWITCH.
STEP 2:
NOW THAT YOU HAVE ADDED A PAGE GONE TO PAGE CONDITIONS AND YOU ARE ON THE SECOND
PAGE LOOK HERE!
SWITCH: Now you get two rather simple options ON AND OFF. CHOOSE ON!!! Now you
should see numbers 001. Press X!
Step 3:
NOW CREATE A NEW EVENT:
GO TO EVENT CONTENT: GO TO THE SIXTH OPTION. Switching, Now Select SWITCH ON.
NOW YOU SHOULD SEE 001 001 PRESS X.
End!
That is how switching work that is what switching is. It changes the page for
you now you can try that. People that I spoke to so far and that I have
explained to understand. That’s all there is to switching. Setting an event
with a switch in it, then that changes the page in another event. You have ot
understand the controls and you have to understand page conditions and adding a
page.
People you don't need switching for everything. Switching is an advanced RPG
Maker technique if you just received your copy you do not need it yet. I have no
better way to explain this.
If you still need help, E-mail me. BUT don't say "send me more info" Maybe "I"
need info. Give me an example of what you are doing, tell me what you want to do
and I'll tell you how you get it to work. I need a scenario in order to explain.
There is no way better than what I just did from scratch. So I can't physically
"Give you more info" Unless you have a scenario you want me to figure out for
you.
=============================================================================
11 Change Screen
Need to change the screen because of the event like flashing or if you have the
character looking out over something, well here is how to do it!
Shift Screen: You can Shift the screen Up, Down, Left, or Right up to 65
different places all over the map. For Example a character doesn't know you are
there so it may be walking around then stop and see you.
Default Screen: After Shifting the Screen have it snap back into place.
Flash Screen: Have the screen Flash for a brief moment.
Swing Screen: Have the Screen Shake.
Change Color: Change the screen color
Default Color: Have the screen go back to its original color.
==============================================================================
12 Inventory
Add an item to your inventory, or cash or remove an item. These may be commonly
used with treasure chest or giving or getting an important item from, them add a
tone and a message to confirm it.
==============================================================================
13 Wait
This disables any screen actions characters will still move but you won't move.
These are commonly used when maybe a big event happened, or you are "Waiting"
for someone to come out the house etc.
=============================================================================
14 Event Status
Change the event direction graphics and other things for effect of the moment.
Event Direction: Change the way the event is facing character object etc.
Move Event: Move the event up to 99 spaces in 4 different directions
Move Event To Point: Make the event move to a certain point, have person leave
town.
Flashing Event: Make the event flash for up to 24.4 seconds
Change Event Graphic: Change the look of the character item for instance a
closed then opened door.
Unable To Execute: Anything after this won't happen
=============================================================================
15 Party Display
Disappear: Make the party invisible although they can still bump into people and
things and activate events
Ghost: Make your party look like ghost (sort of see through) This is used say if
they go back in time and they are seeing something and they are not really
there.
Default: Have your party go back to normal
Flashing: Have your party Flash for up to 24.4 seconds
Main Character: Change the graphics of the main character in front.
=============================================================================
16 Party Members
You can change your parties make up by adding or getting rid of a party member.
Add; Means someone new joins you, usually accompanied with a message or some
sort of sound.
Remove; Someone has to leave now =(
Change whole Party: Change everybody in the party
Move to Front: Move a Party member from the back into the front usually used
when that character is going back to its hometown.
=============================================================================
17: Move Party
Character Direction: Change the direction of the main character so he can look
around or turn around and speak to his party.
Move Party: move the party a certain point usually use this with the take over
event option.
Move Party To Point: Move Party To A Certain point on that Dungeon.
Gather Party Members: Make it so that the Party is right behind the main
character where you cannot see them.
=============================================================================
18: Party Status
Change the party Status badly, say if they are walking through a poisonous marsh
or a character like a witch petrifies them
Poison, Paralyze, Petrify, Restore Status, Increase/Decrease Hp/MP, Increase
EXP.
=============================================================================
19: Character Status
You can set it so a character loses or gain abilities or stats similar to the
Party Status mentioned above.
Learn Magic- Have them learn a new magic spell say if they meet a wise men or a
wizard.
Change Skill- Say your party is at a P.O.W. camp and some old dude taught him
something well here is the new skill.
Remove Equip: Some bully stole your fitted Yankees cap.
You can also Change, STR, DEF, STA, INT, Agi, Luck, or M Def
=============================================================================
20: BGM
Change the Background Music. You change the volume or the tempo and you can do
reverb. Reverb is the depth of it.
=============================================================================
21: Sound Effect
You can make a Sound Effect here you can also change its pitch from Loooooow to
HIGH!
=============================================================================
22 Shop
With the exception of INN you should have a message before doing this. Inn comes
equipped with message, the other ones don't. You should have an ending message
as well, like Thanks for shopping!
INN: Select the value at staying at the inn from 0-9999 be smart please...
Item: Item Shop select items you want to be put in the shop you already set the
values for them. Think though you want cheap items for the beginning and
expensive in the end.
Skill: Set the new Skills you can obtain here, a shop like this one should be in
an odd place or taught by a wizard or a town bum.
Trade: This is a unique shop where you give item(s) in return for item(s). You
can't trade an item for the same item.
==============================================================================
23: Battle
This is usually used for a boss fight or an important fight.
Select Monster: Select the boss to be used
BGM: Select Back ground Music
Battle Until End: Set this on so that the battle will end when you defeat the
enemy
Battle To: Set the number of rounds this battle will have
==============================================================================
24: Game System
Magic Level, Equip, Skill, Gold, Monster can be set on or off
==============================================================================
25: Effect
You can make an effect happen like an exploding rock or a lightening bolt plus
some more.
Explosion: Pick from 15 other things besides explosion
Main character make it happen where the main character is at.
Sound Effect: Add a sound to it
Preview: See what it looks like
=============================================================================
26: Display Title
Self Explanatory really, shows the title you made in Title Edit.
=============================================================================
27 Ending
Change the BGM and show the ending now
Snap shot, take a clip of the scene so it can be used at the end, for background
=============================================================================
28: Prohibit Escape:
Make escaping a dungeon impossible, using the escape dungeon magic.
=============================================================================
29:Save Point
Make a Save Point For Your RPG, usually placed before a boss fight and make it
stand out. Also a message before it like "Do You wish to save?" Is helpful
=============================================================================
30: Next Scenario
Sort of like Change Disk in other RPG's this is used when you have so much
Scenario data it doesn't fit on one Memory Card.
=============================================================================
31: Exit Event
Make the Event stop at what point it is.
+++++++++++++++++++++++++++++++++++++++++++++++++++++++++++++++++++++++++++++
Anime Maker Walkthrough
RPG Data: This is used for creating ,a Title Screen, Enemies or, Character Main
or Town Folk. You can also edit existing characters title screens or Monsters!
This is how it works when you create things. From scratch is pretty hard, how
about VERY Hard and time consuming. A Very useful thing no one knows about yet
is editing existing characters. Go to the memory card icon on the bottom of the
screen. Then Edit, you can change hues of the character if say you disagree with
the hair color or you don't like palettes offered. Knowing what character a
color you want to edit before hand saves time. You can also edit the characters
used for animation and non RPG Maker Data here. The same goes for title screen
and monster although they are more difficult to edit a few brush-ups on a
monster never hurt anyone.
With Animation or creating a story you use some pretty basic characters. I won't
go to in depth here since you get a very easy to use in game walkthrough any
thing I say here is already explained in the game. Just press square where you
are stuck.
+++++++++++++++++++++++++++++++++++++++++++++++++++++++++++++++++++++++++++++
Game FAQ
Idea E-mail me: I answer question I post question to stop the flow of e-mails.
!: Switches?!? Help!
A: Millions of e-mail on this one well I got I will use a great example for this
one. Here is a step by step explanation of switches.
This is the scenario:
John wants to get into the hut. The hut leader will not let him in because he
doesn't have the password. John goes to see Dyson Dyson knows the password.
Dyson gives John the password. John goes back to the hut and the hut leader
allows Dyson through.
How do you do it?! Simple!
First: Go to Create Event in front of the hut.
Create event Graphic then set it so he doesn't move.
Display message: You can't get in with out the password.
Now press Triangle.
Now add page Front.
Now scroll down to page conditions
Go to switching.
Put switch 001 on.
Now go to display message: You have the password you can enter.
Now go to event status move event 1 left.
Now Create a new event
Set the event graphics and have it do not move.
Display Message: The password is RPG Maker
Now go to Switching Switch on 001.
Now Test play. First go to the hut guy then to Dyson and then to the hut guy. I
can't think of any better way to explain this!
2: HOW DO I STOP INTRO EVENTS?!?!
A OK, I got a lot on this one and here are you're answers people!
First after creating the events in the room have one event have a switching
event in it, lets use Switch On 001. On the intro event Add Page Back Then the
Events Content on this page will be Exit Event, and The page Conditions Switch
001 on. This will stop it if you return to that dungeon.
3. How Do I make Event Characters (joining my party or boss) disappear?
After the messages events(with boss after Battle) Go to Event Status Change
Event Graphic, No Graphic. (With adding a character go to Add party Member).
Then go to Switching Switch 001 On. Now add a 2nd page to it, chose Add page
Back. Have No Graphic under Start put Do Not Start and then for Page Conditions
put Switch 001 on.
4. How Do I stop a normal event from occurring.
Add a 2nd page to it on the 2nd page Put No Graphic, under start put Do Not
Start
and under page Condition put Switch 001-on.
Q: How can I have an event start as soon as I get on the screen:
A. That’s called an Intro Event, it will always start as soon as you get there.
Q: Was the Game Easier of Harder than You expected?
A: Actually in MY OPINION I though it would take a month to figure it out. It
took me a complete day to figure out how to use each feature. So it was
basically easier than I expected
Q: Is it worth buying?
A: Depends on how much of an RPG freak you are. If you are a casual player who
is satisfied with a good adventure, then you do not need this. If you are a
hardcore RPG player, who loves the thrill of blasting through RPG's and you need
more then you need this game!
Q: Can you make your own battle system or use a pre-determined battle system?
A: Pre-determined, it’s a LOT like Phantasy Star.
Q: Why did you spend the time to write a FAQ for rpg maker?
A: Well, I waited MONTHS for the game. Then it finally got here, I spent that
entire day playing it, and then I curved my skills in it. Then I reviewed it and
got numerous questions for it. Then I figured to help more people I would do a
FAQ on it.
Q: Do I get to design the graphics of the characters, enemies, such...and how
in-depth do I get to make the combat system?
A: Yes, you have to be a good artist to do it from scratch, but editing is easy
but a pain in the wrist with a controller. It can go from mashing X to using
skills and special attacks.
Q: How come when I went to create event I created it, now I'm on test play and
all I see is a Black Screen?
A; You forgot to create the dungeon, or you placed the event in the place where
you can't see anything?
Q: How come I'm walking all over buildings and water and stuff?
A; Because you are in test play, in actual play it does not do that.
Q: How do I make put a room inside of a building?
A: You have to create a new dungeon.
Q:How do I get characters to talk and move?
A: You have to create an event and give it graphics
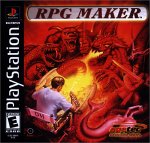
Q: What does the cover look like?
A; There is a kid on the bottom and the rest of the cover is red with monsters
on it.
Q: How do you create any kind of shop?
A: Go to Event Options Shop
Q: How do you people regular townsfolk in towns?
A: Create event: On the first screen before you press x to give the event stuff
press down then chose graphic character graphic. The adjust its walking pattern.
Then go to event contents Display Message.
Q: Whats white melt and all that other stuff?
A: It's how the screen will look when you do a move event
Q: How do you link your field to your town?
A: While editing your field press triangle for a whole list of options then go
down to town place your town on the map.
Q: How do you have a character join your party at a certain point?
A: Event Content Party Members: Add character
Q: How can I get rid of a character who has joined my party?
A: Party Members: Remove Character
More Questions when I gettum!
+++++++++++++++++++++++++++++++++++++++++++++++++++++++++++++++++++++++++++++
Thanks:
I would like to thank the following:
God for life and the butt of steel to make me sit here and type all this
GameFAQs for hosting my FAQ, and all my other random spewage.
I would like to thank ([email protected]) for the attack +1 skill
correction!
I would like to thank [email protected] for some tips on the Do Not Start
thing.
Agetec for not releasing this game in December or later...
Gobli the Goblin I want to be a boss too!
And all the guys from GameFAQs who reek of awesomness!
Come visit my E-Fed!!(Cheap plug) All you e-fed guys reek of awesomeness as
well!
http://www.angelfire.com/wrestling/wwffefed
It reeks of awesomeness!!!
+++++++++++++++++++++++++++++++++++++++++++++++++++++++++++++++++++++++++++++
Copyrights:
RPG Maker is a copyright of ASCII, and Agetec. All Rights Reserved
This Frequently Asked Question originally posted at www.gamefaqs.com, is
copyright of the author. This can not be altered or transmitted or publicly
displayed without the written consent of the author ([email protected])
Copyright 2000 By Dyson Turner


